Before we're getting started, it's important to know you must own or have access to the domain you are trying to redirect. See more here.
Step 1: Create a redirect.pizza account
Get started today by creating an account: https://redirect.pizza/register.
Step 2: Add your domain to redirect.pizza
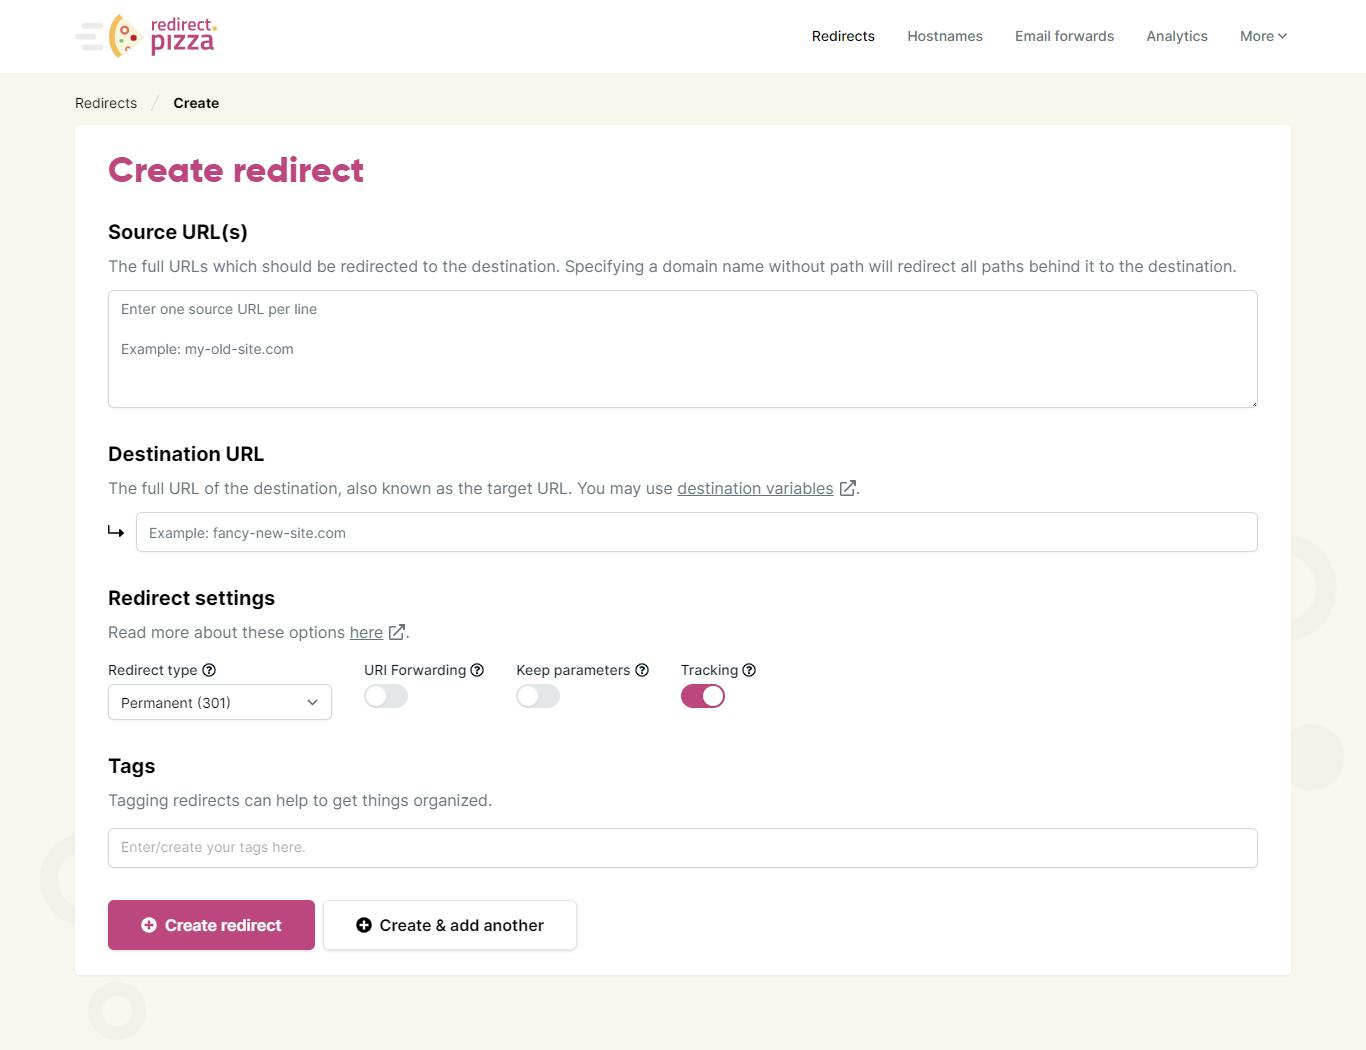
Add the domain you wish to redirect. For our example, we have a domain with GoDaddy 'redirect-pizza-example.xyz'. Add the domain to the 'Source URL' field. We recommend adding both www and the apex (non-www) as separate sources. Not sure why? See our guide on redirecting non-www to www.
By default, redirect.pizza uses a permanent 301 redirect and automatically provisions an HTTPS certificate for your domain. If you need a different redirect type (302, 308, frame, or meta refresh), you can change this in your redirect settings.
You see the DNS spinning, and the detected & required values are different.
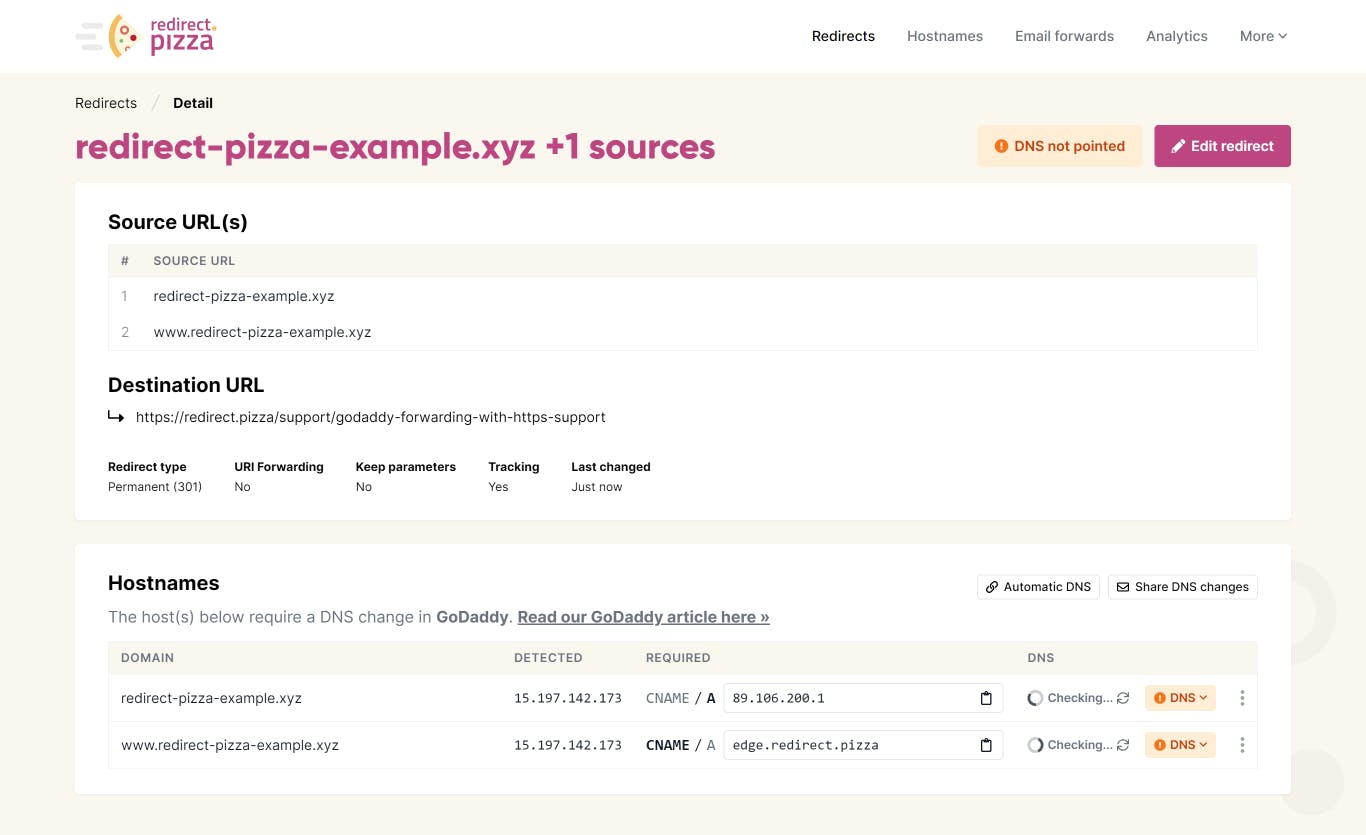
Step 3: Making the DNS change
This differs per domain. The DNS change must be made with the domain registrar or DNS provider. They have an option to change the DNS zone for that domain. For more help per provider, it's best to contact the domain provider and share the necessary DNS changes. Most of the time, they are happy to help you make that change!
We have step-by-step walkthroughs for popular providers:
- GoDaddy: Forwarding with HTTPS support
- Namecheap: Forwarding with HTTPS support
- Cloudflare: Forwarding with HTTPS support
Unsure which provider your domain is under? See What are these DNS changes?
Step 4: Waiting
Changed the DNS? Awesome! You can see the DNS propagation progress with a site like WhatsMyDNS. For our example, you can see for instance that the DNS change has been fully propagated: https://www.whatsmydns.net/#A/redirect-pizza-example.xyz
When it's fully propagated (note: this can take up to 24 hours), redirect.pizza should detect that and show a green checkmark next to the DNS records. If something isn't working as expected, check our troubleshooting guide for new redirects.
Step 5: Done!
Green checkmark is shown? Then all is set-up, and traffic is flowing through redirect.pizza! You can track your redirect performance in your analytics dashboard.
For a more detailed walkthrough covering DNS options and redirect types, see our domain redirect setup guide.
