When you want to forward your domain, Network Solutions provides out-of-the-box basic support. But some important features are missing. Features like HTTPS and Analytics.
When you set up a redirect at Network Solutions, you still have to take care of the security of both domains yourself. There’s no automatic installment of an SSL certificate. This will result in SSL errors when visiting the domain via HTTPS.
So how do you secure your site with HTTPS when using Network Solutions?
This can all be done with the help of redirect.pizza. redirect.pizza automatically installs and manages the SSL certificates on your website, to make sure your security is always up to date. And there’s more to benefit from. With redirect.pizza, redirecting your apex domain to the www. version of your domain is done in a few clicks.
If you’d like to set this up, just follow the steps in this walkthrough, and you’ll be good to go!
Step 1: Create a redirect.pizza account
Get started today by creating an account: https://redirect.pizza/register.
Step 2: Add your domain to redirect.pizza
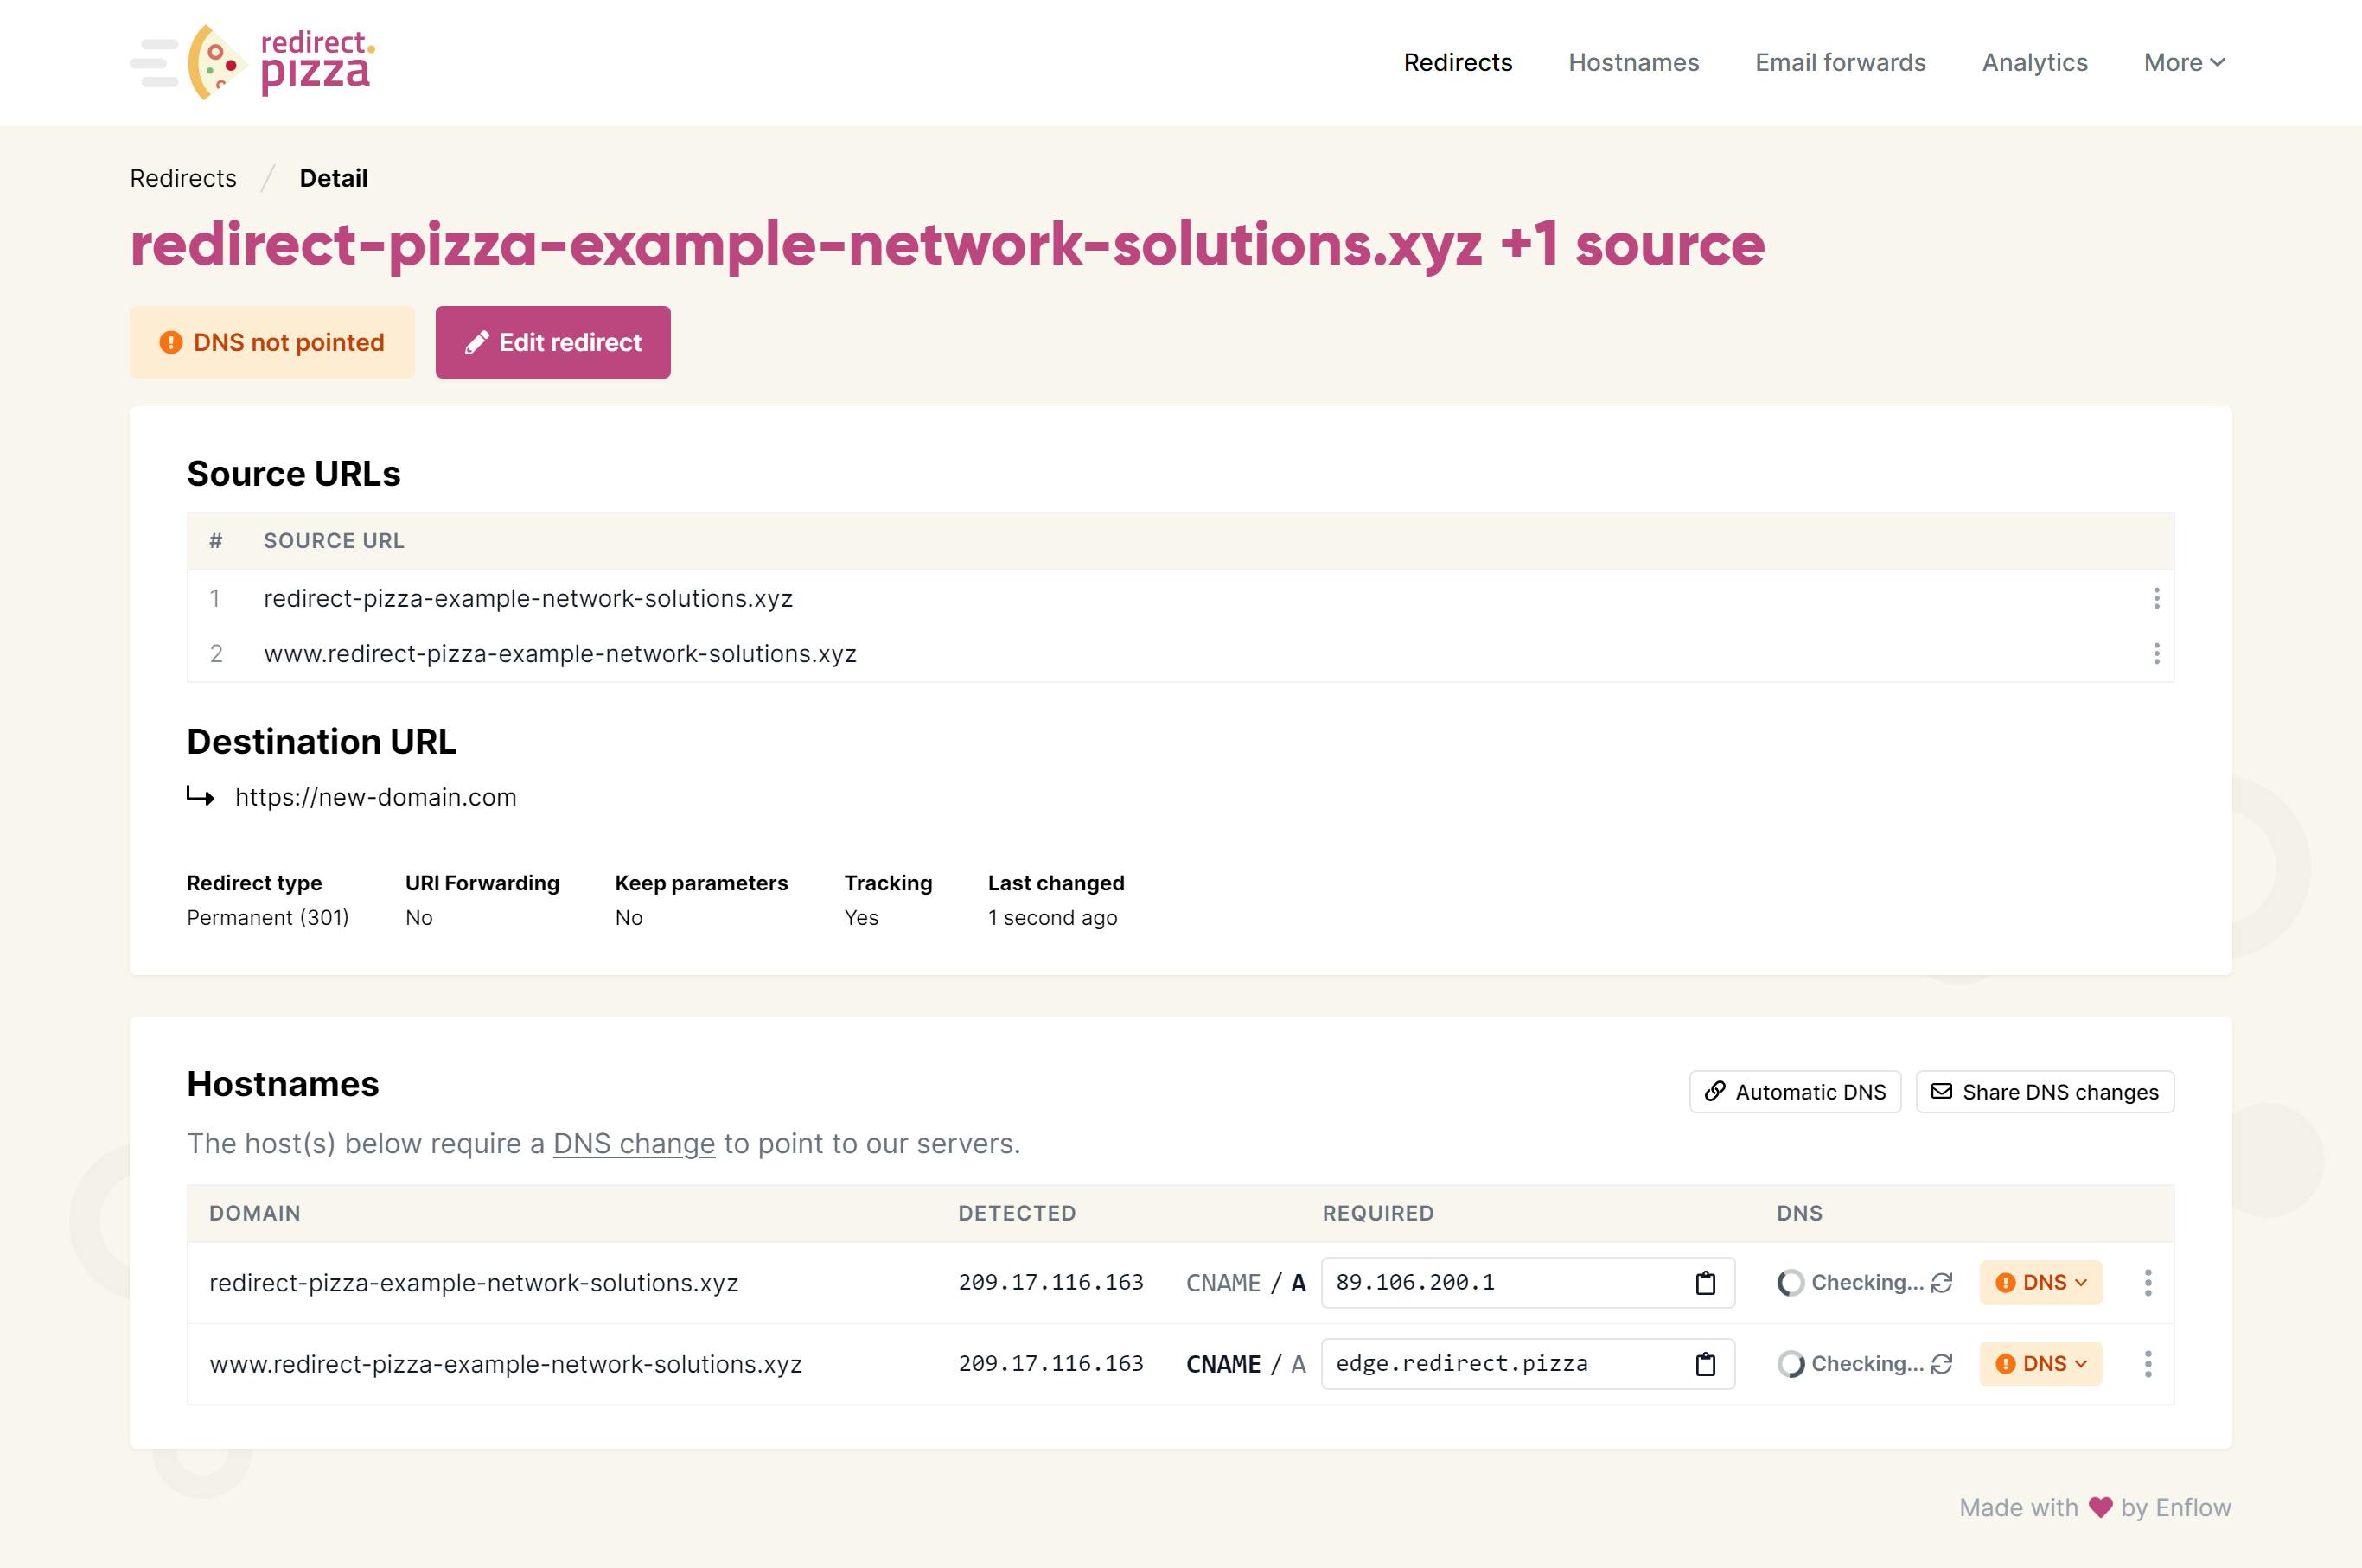
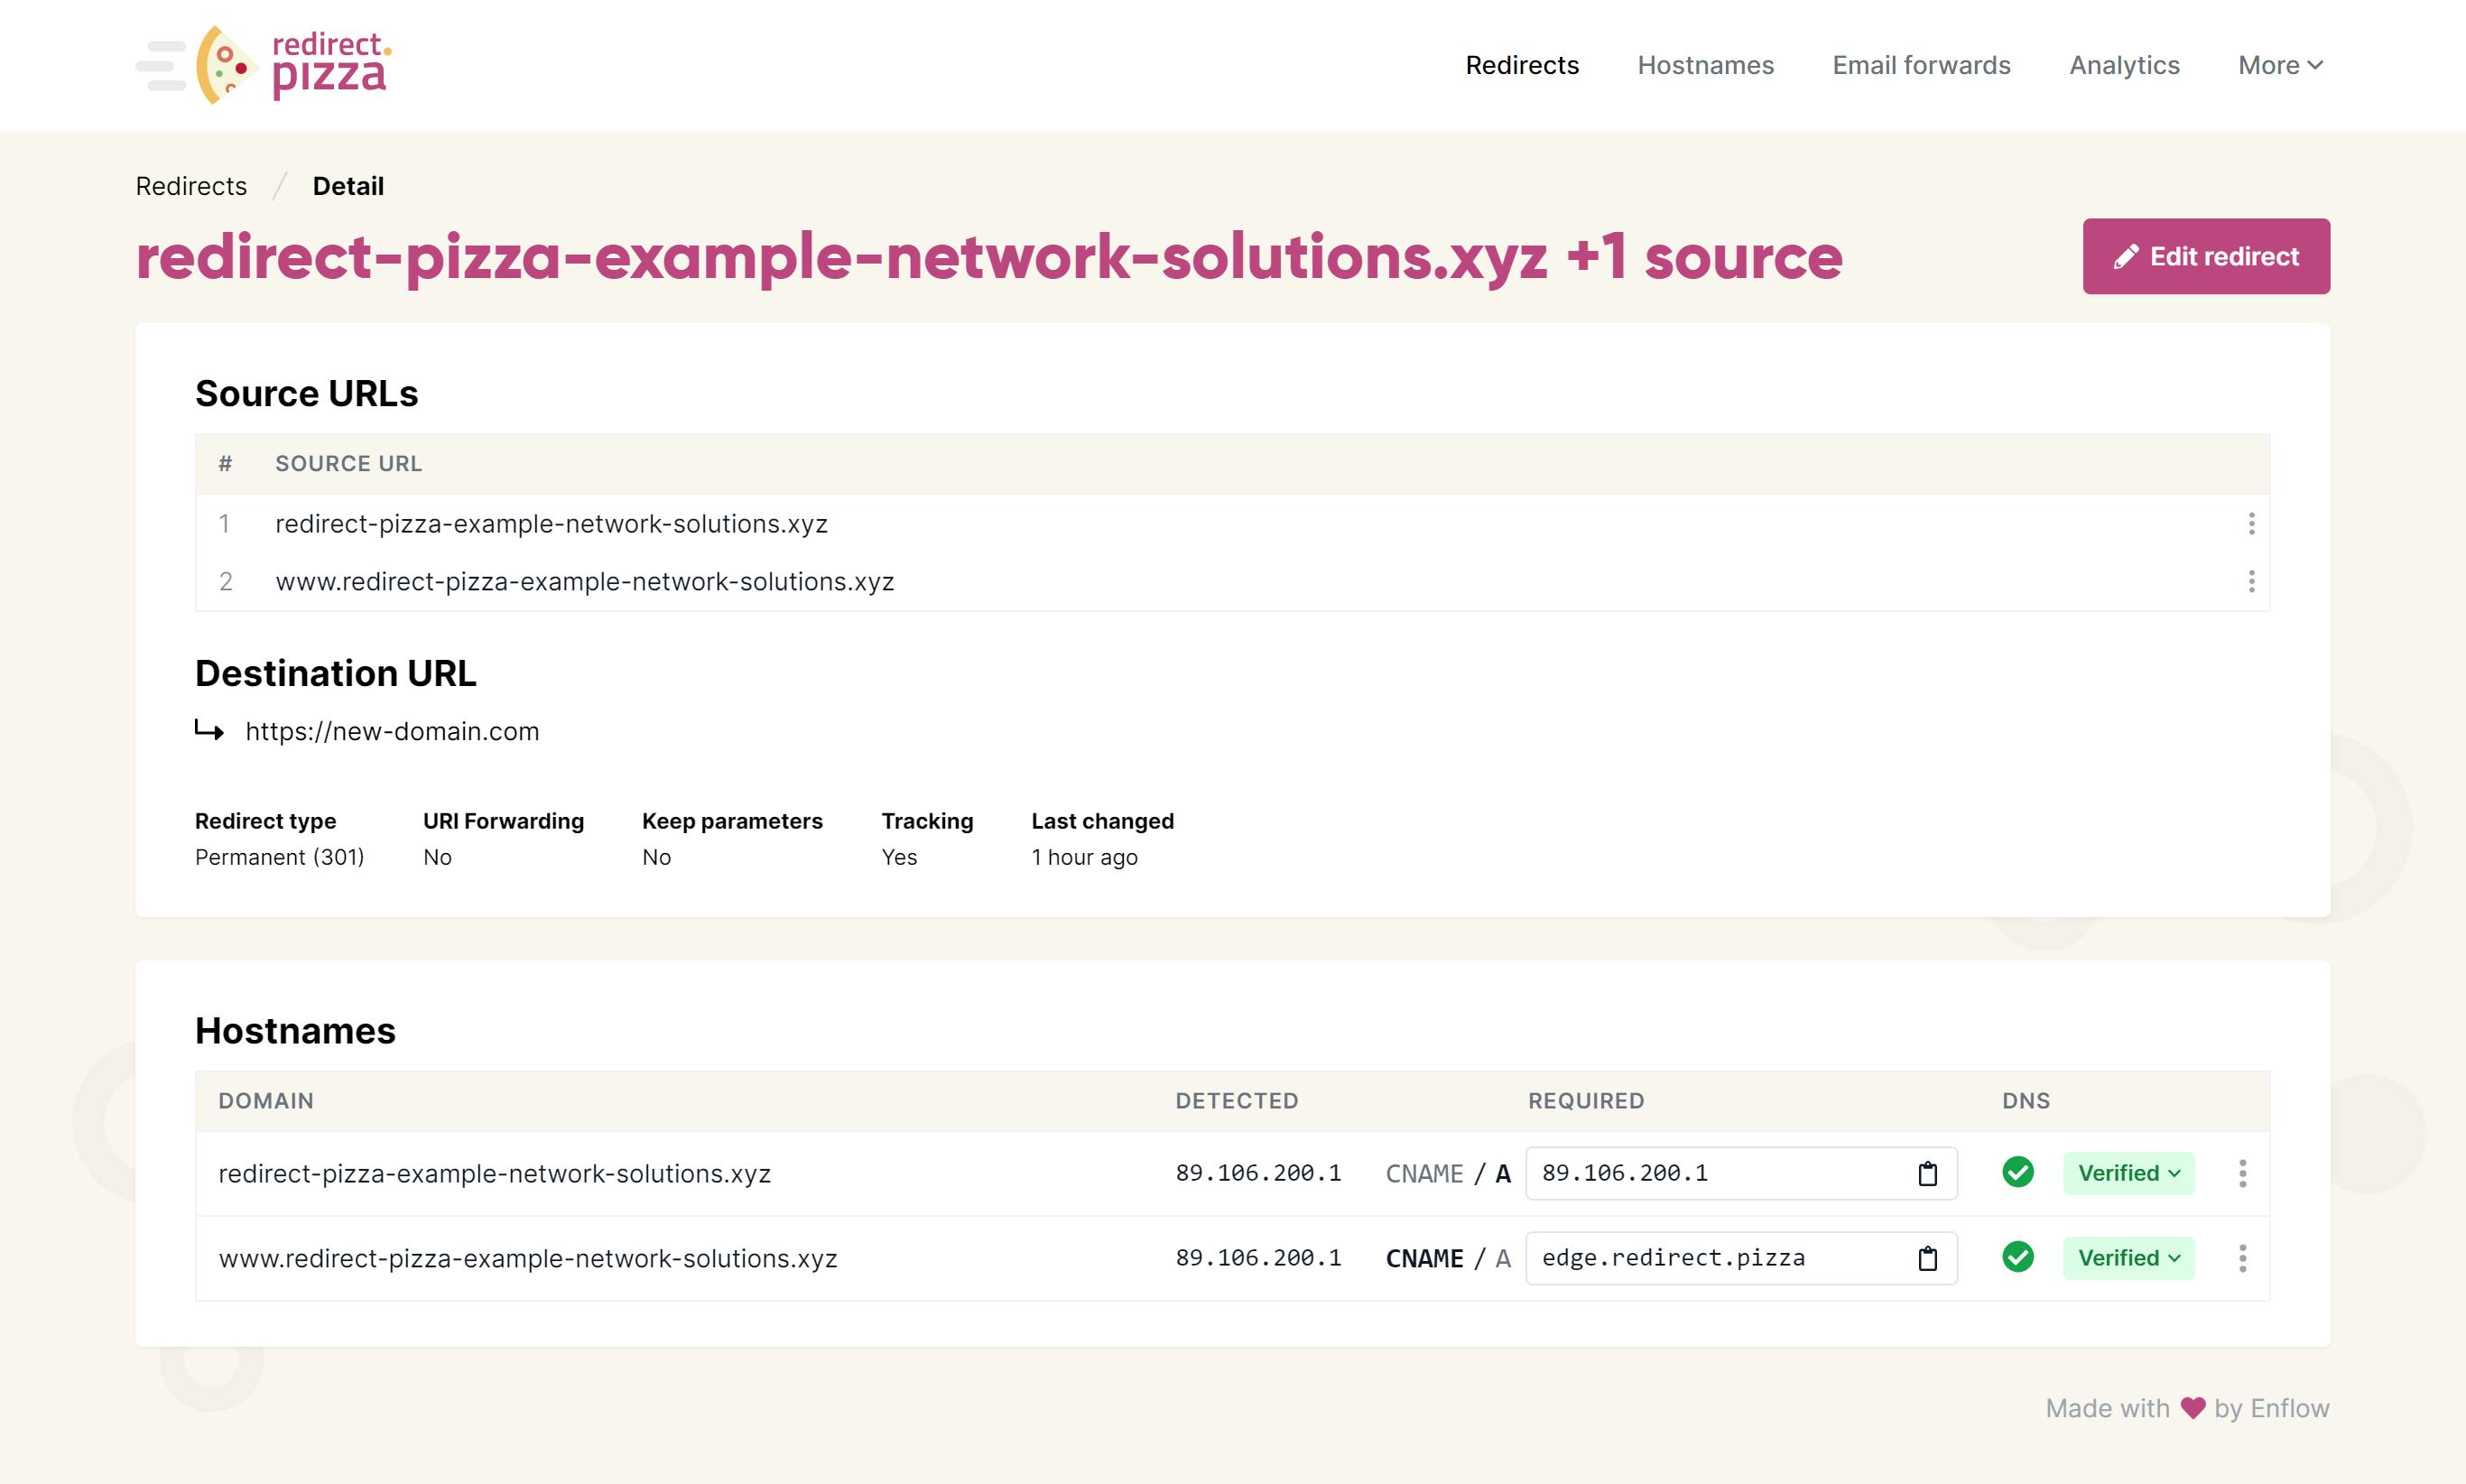
Add your domain you wish to redirect. For our example, we have a domain with Network Solutions 'redirect-pizza-example-network-solutions.xyz'. Add the domain to the 'Source URL' field. We recommend adding www & the apex (non-www).

You see the DNS 'checking' as the detected & required values are different.
Step 3: Navigate to Network Solutions
To allow redirecting via redirect.pizza, we need to make a one-time DNS change at Network Solutions.
Login with your Network Solutions credentials and from your Dashboard click on 'Domain Name'.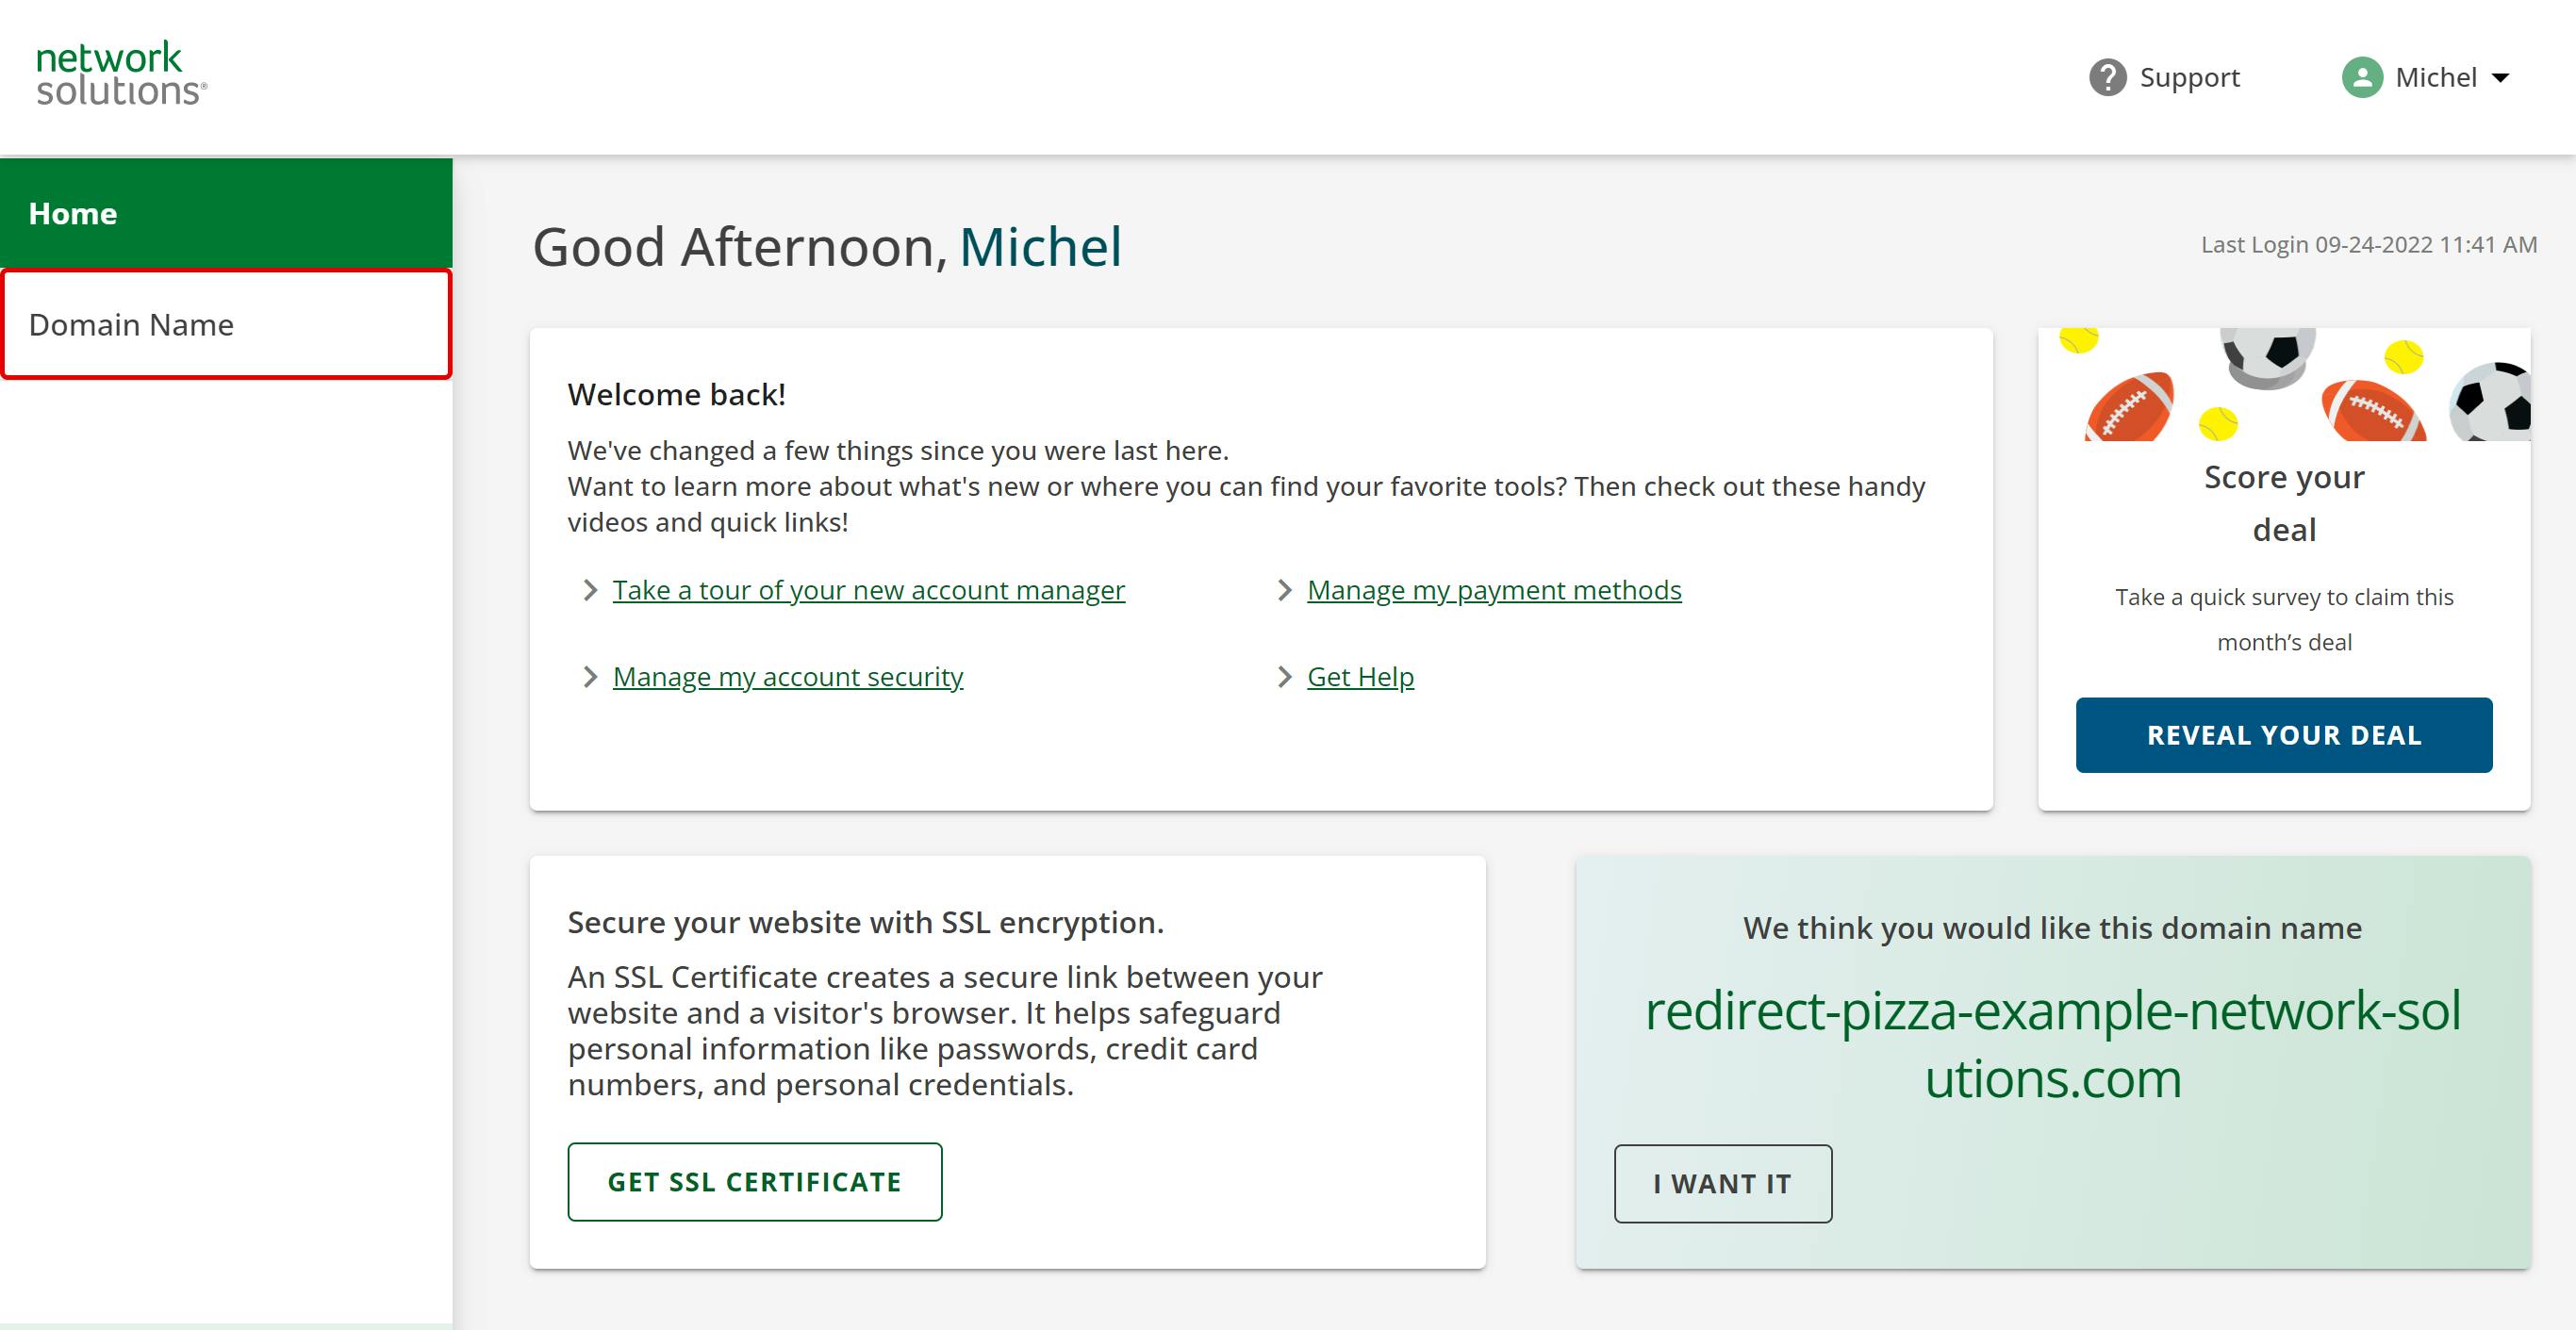
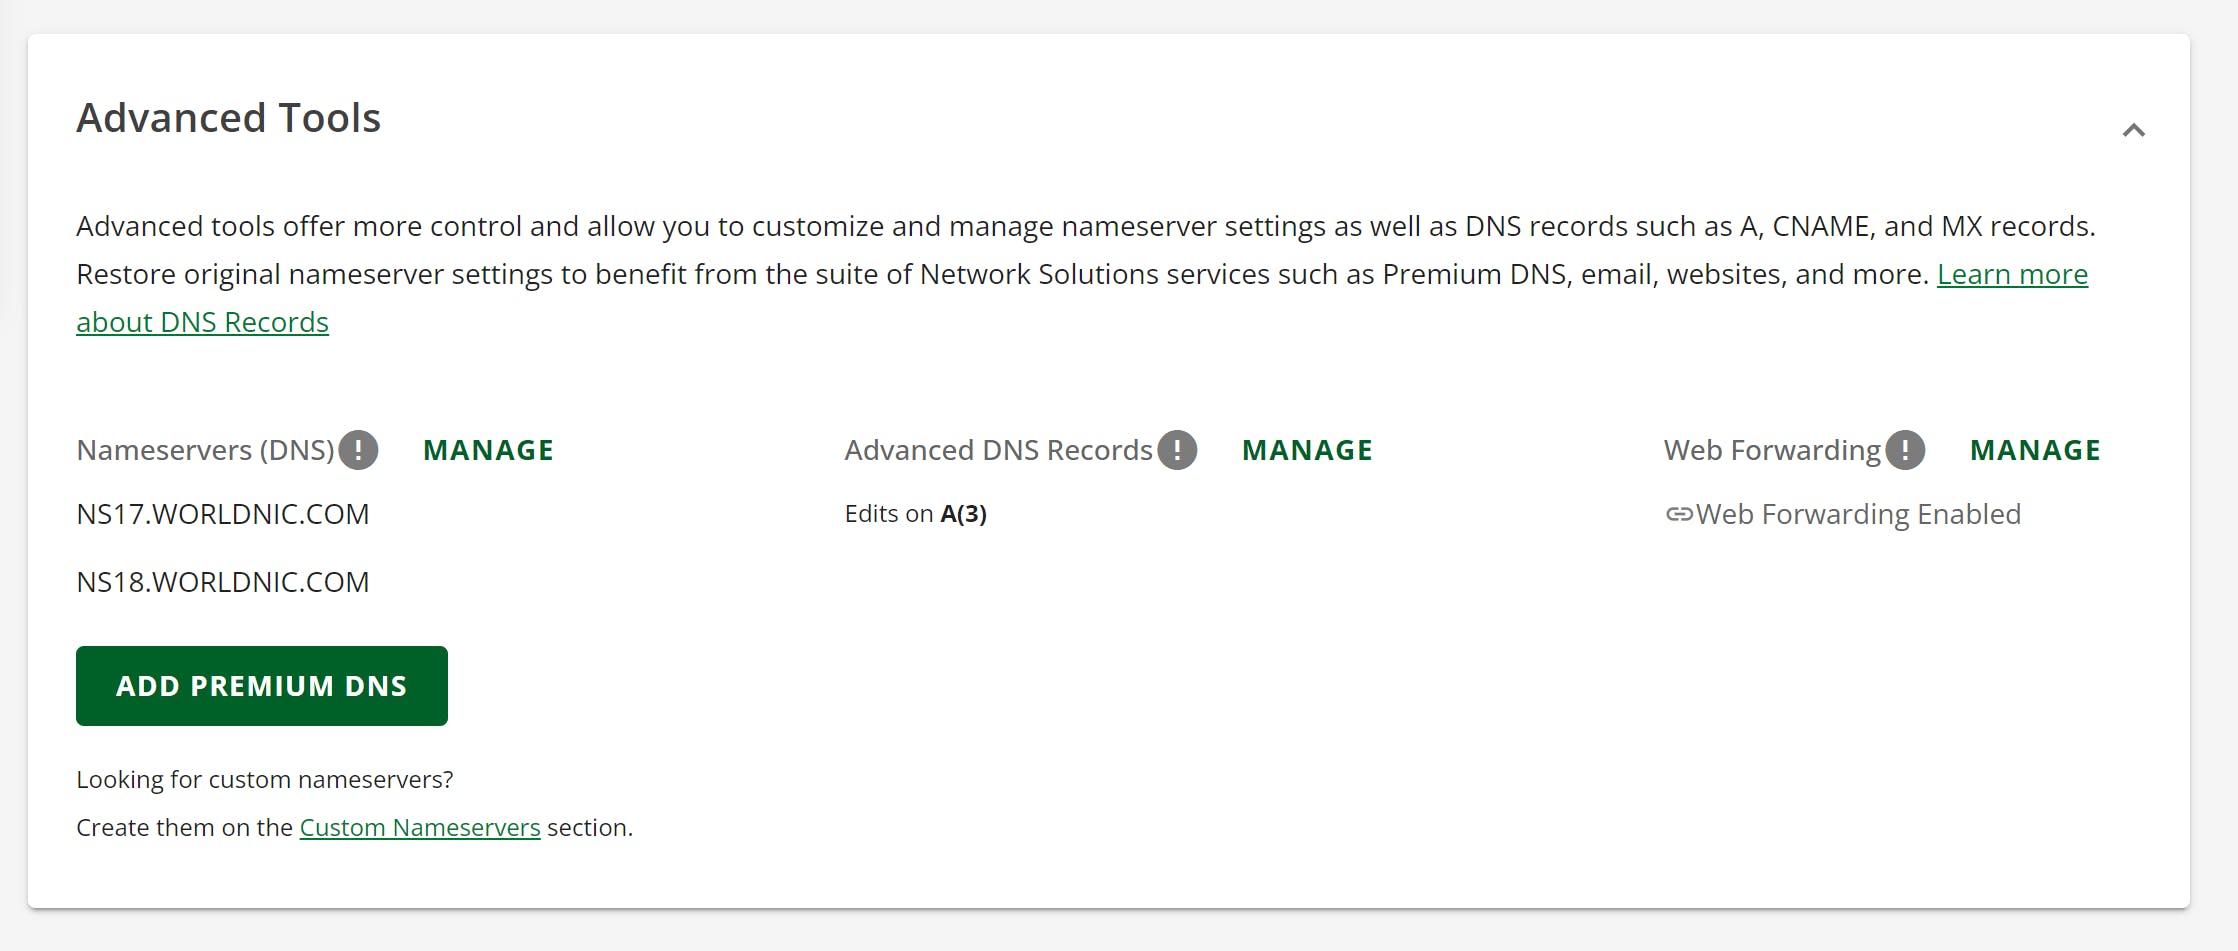
From this screen click on 'Advanced Tools' to open this panel.
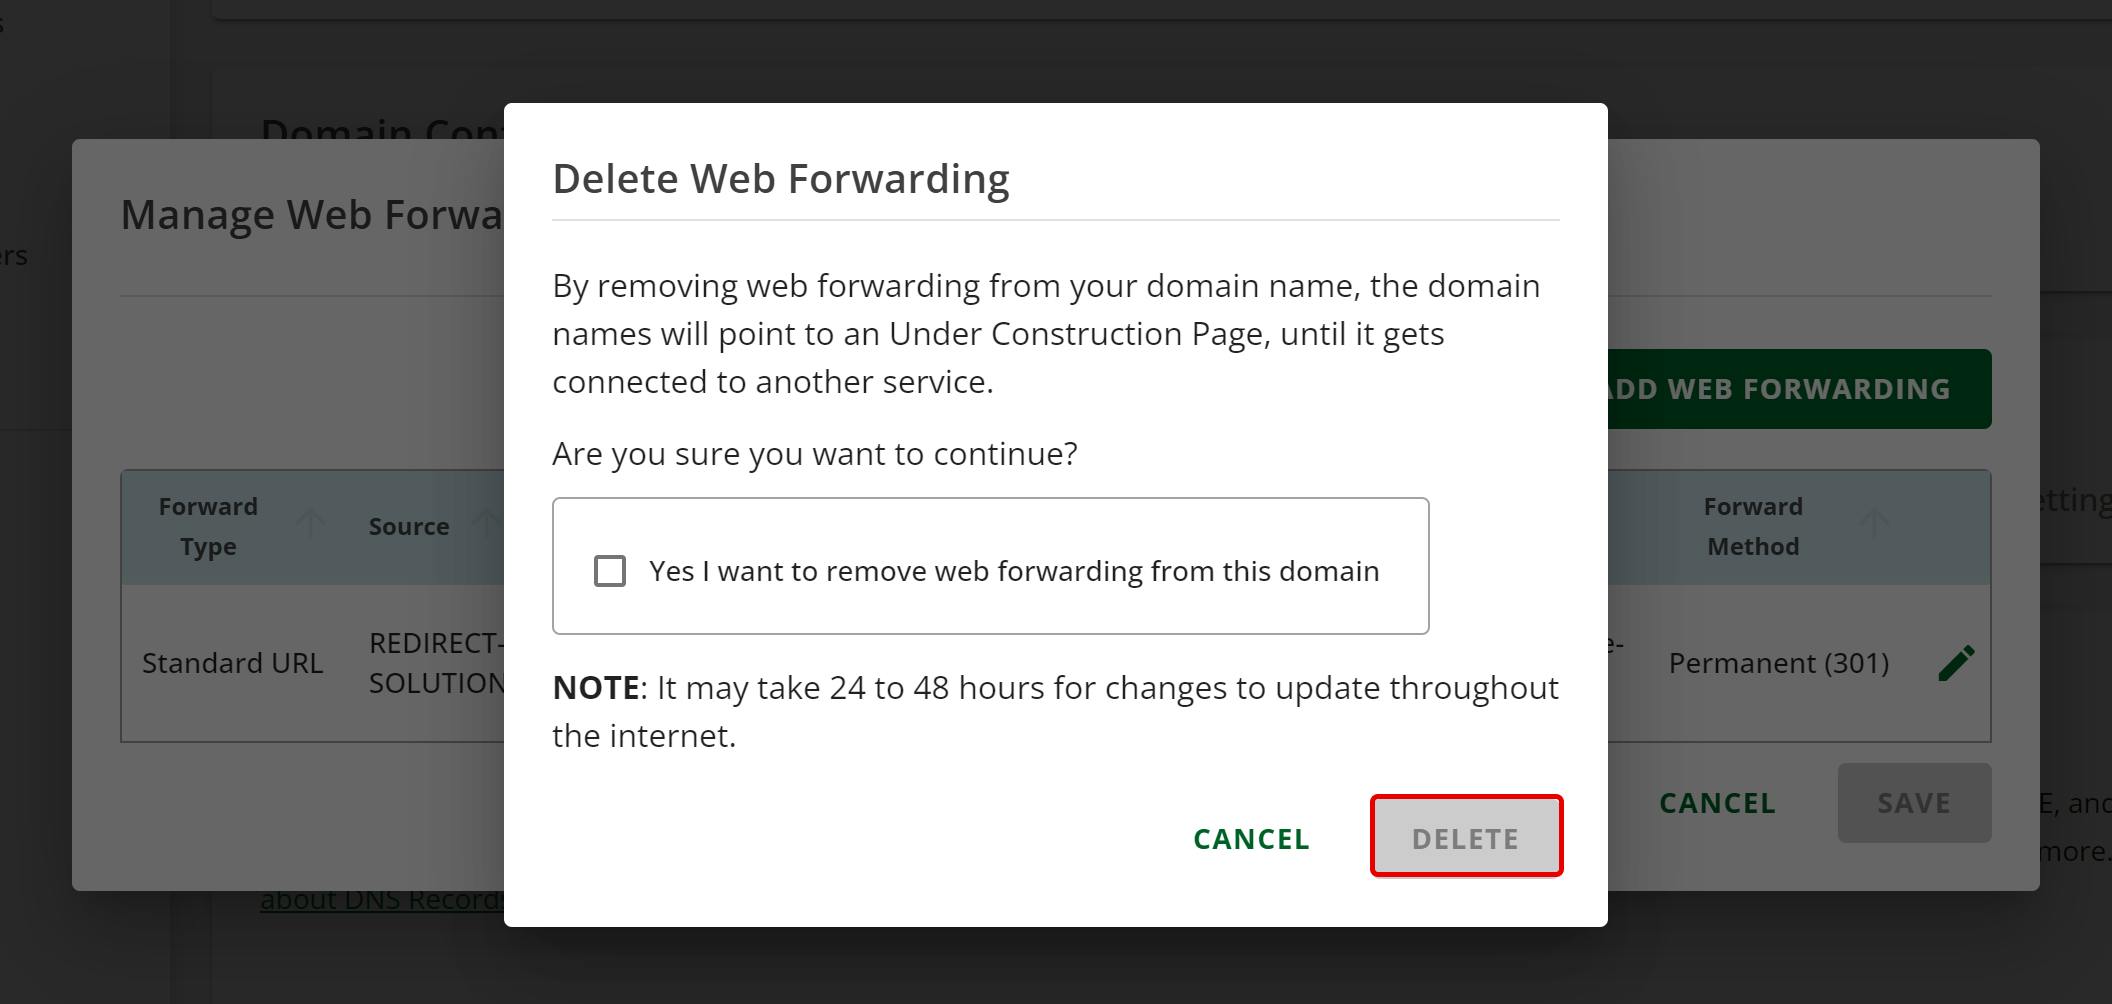
Remove existing Web Forwarding (optionally)
If you have already enabled Web Forwarding, remove this first.
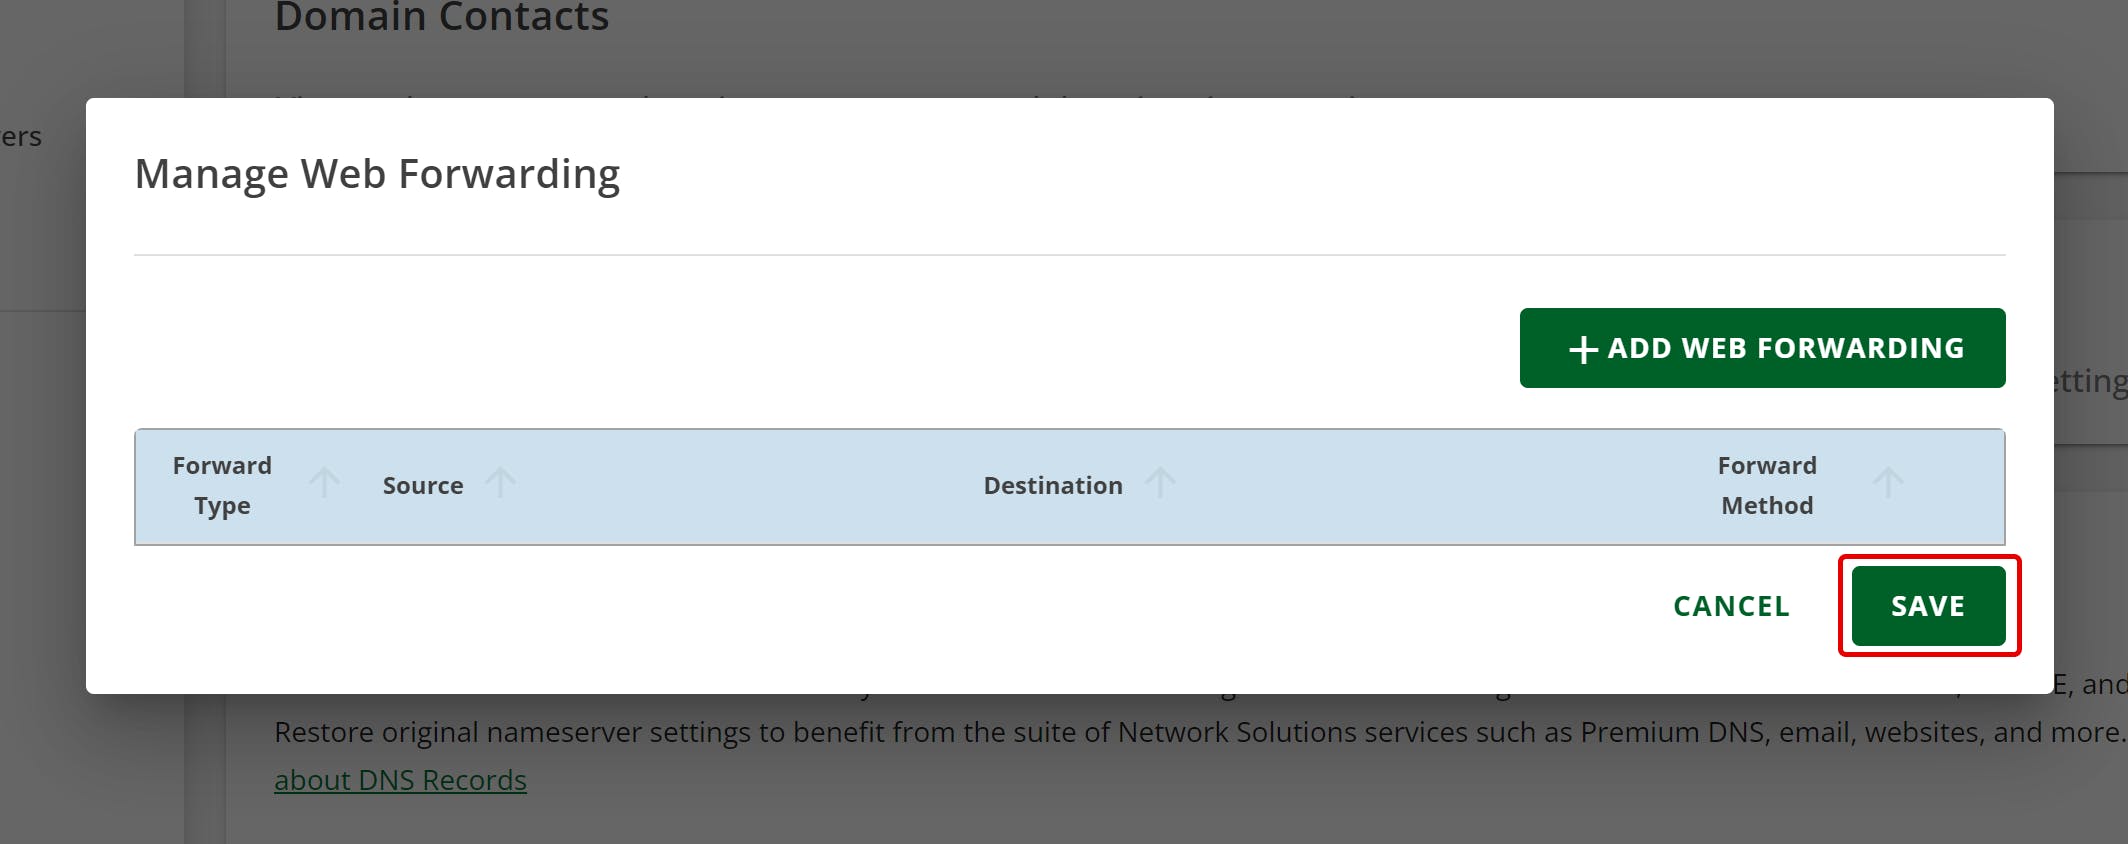
Click on 'Manage' next to Web Forwarding.

Click on the 'Pencil icon'.
 Click on 'Delete'.
 Confirm your action by clicking on 'Delete'.
Save your changes by clicking on 'Save'.
Step 4: Changing the DNS
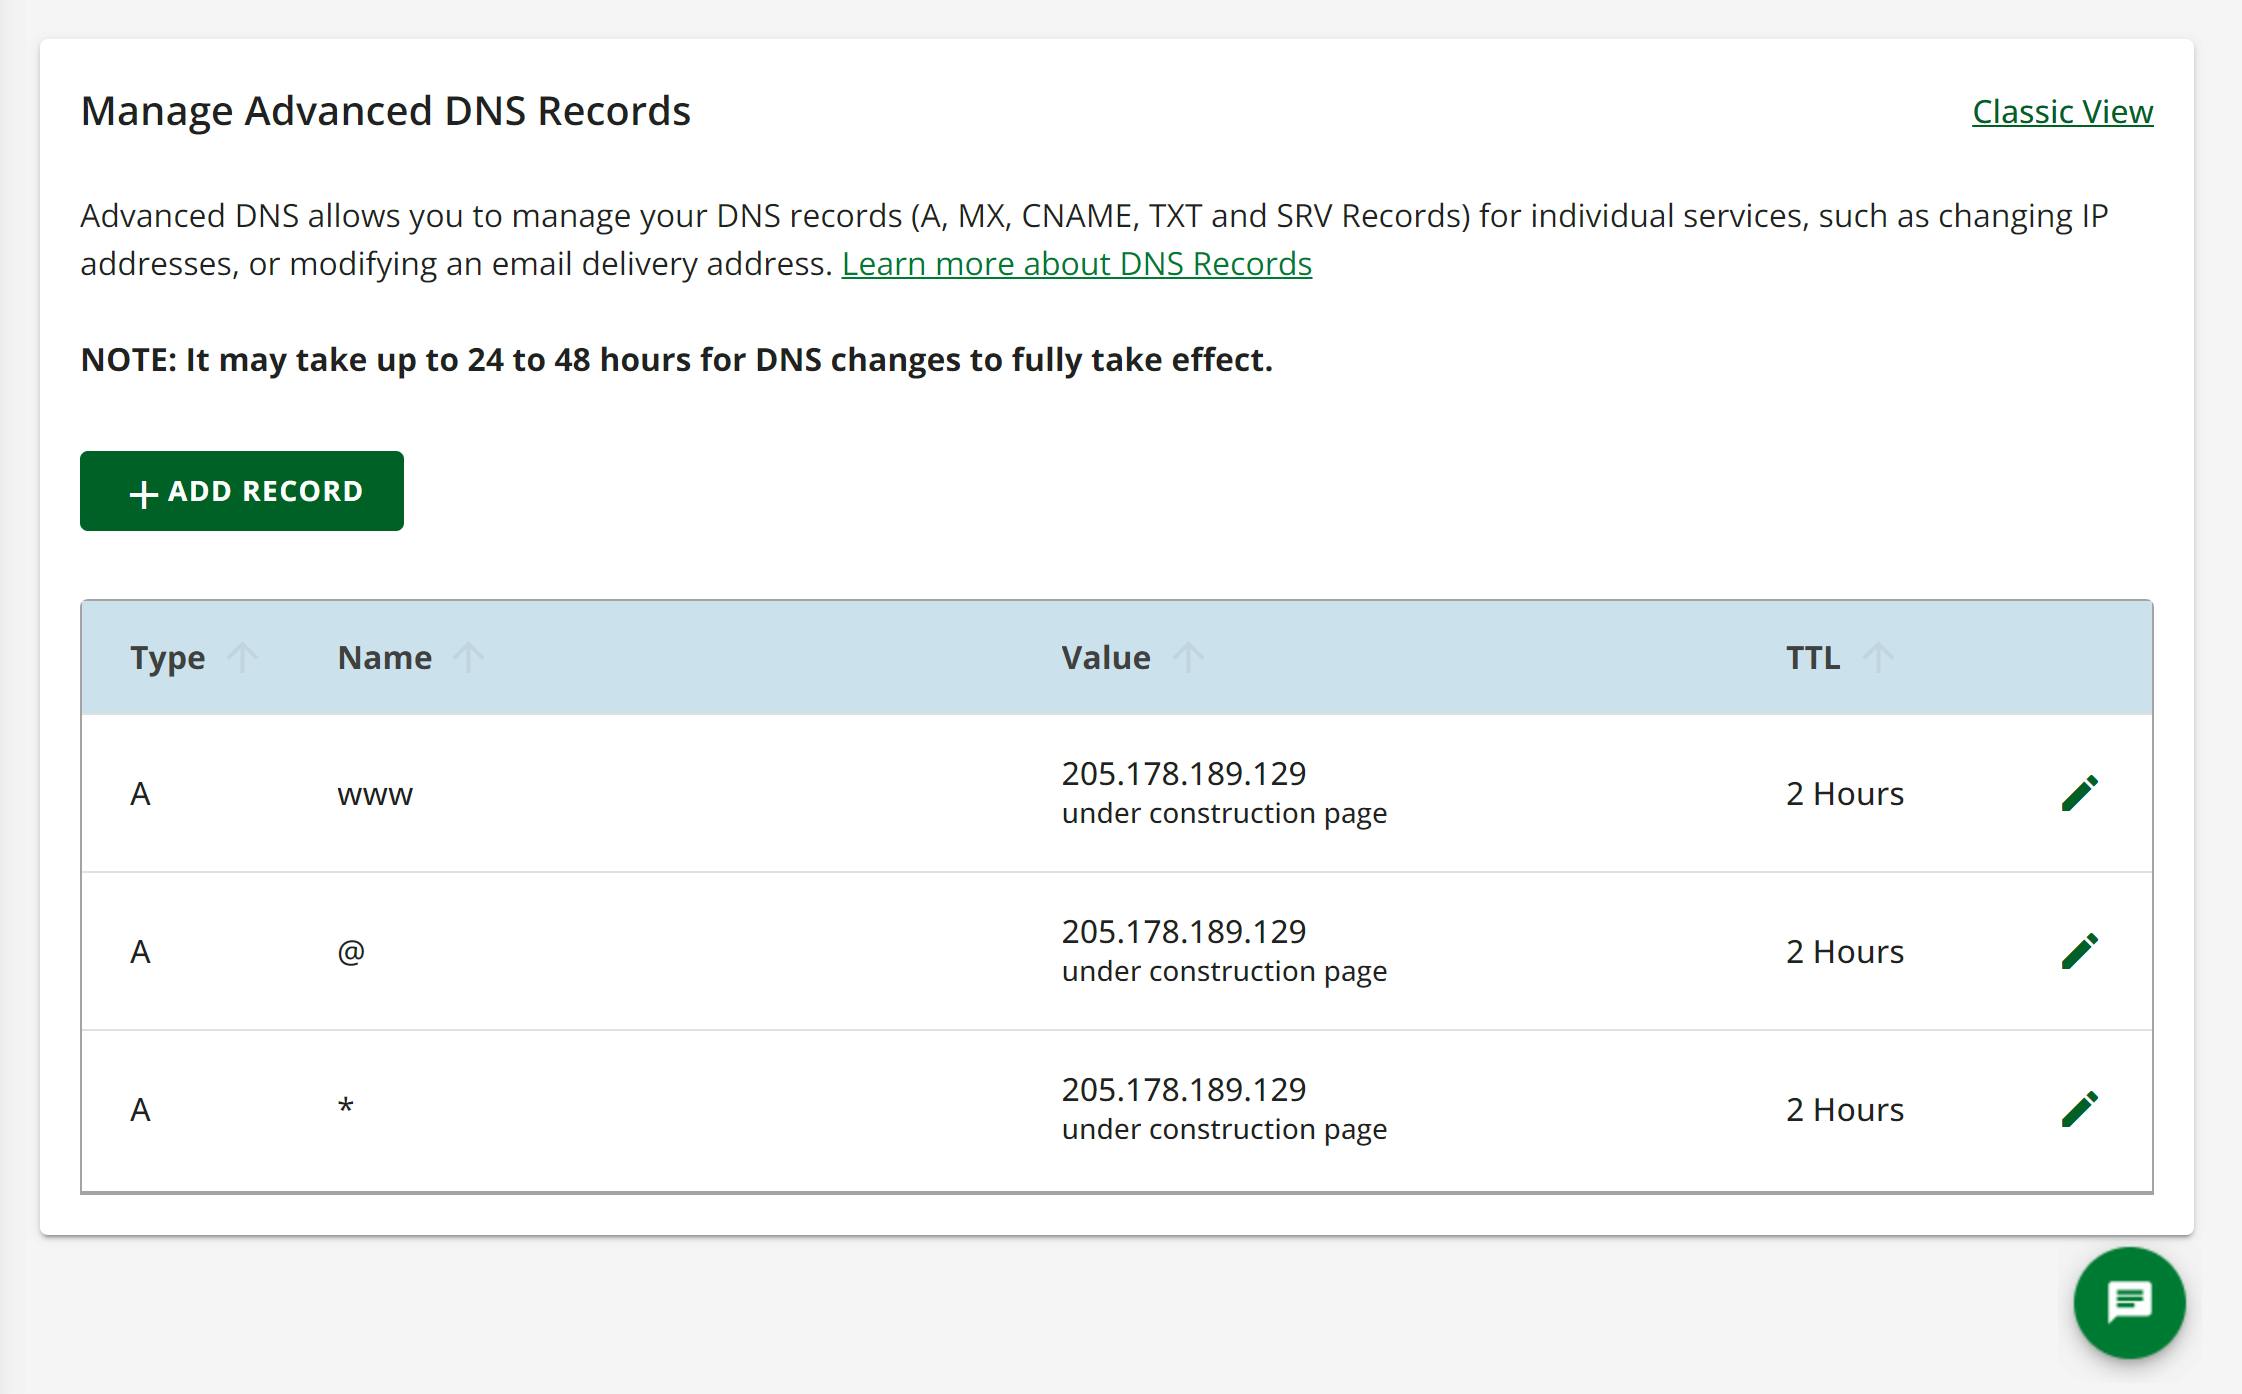
We are now ready to change the DNS. From the Advanced Tools segment click on 'Manage' next to Advanced DNS Records.

You will see a screen that looks something like this. The records defined may be different.
The changes below assume a redirect for non-www & www. Consult your redirect.pizza account for the exact changes.
Before adding the correct DNS records, make sure any existing A record for 'www' and '@' are removed.
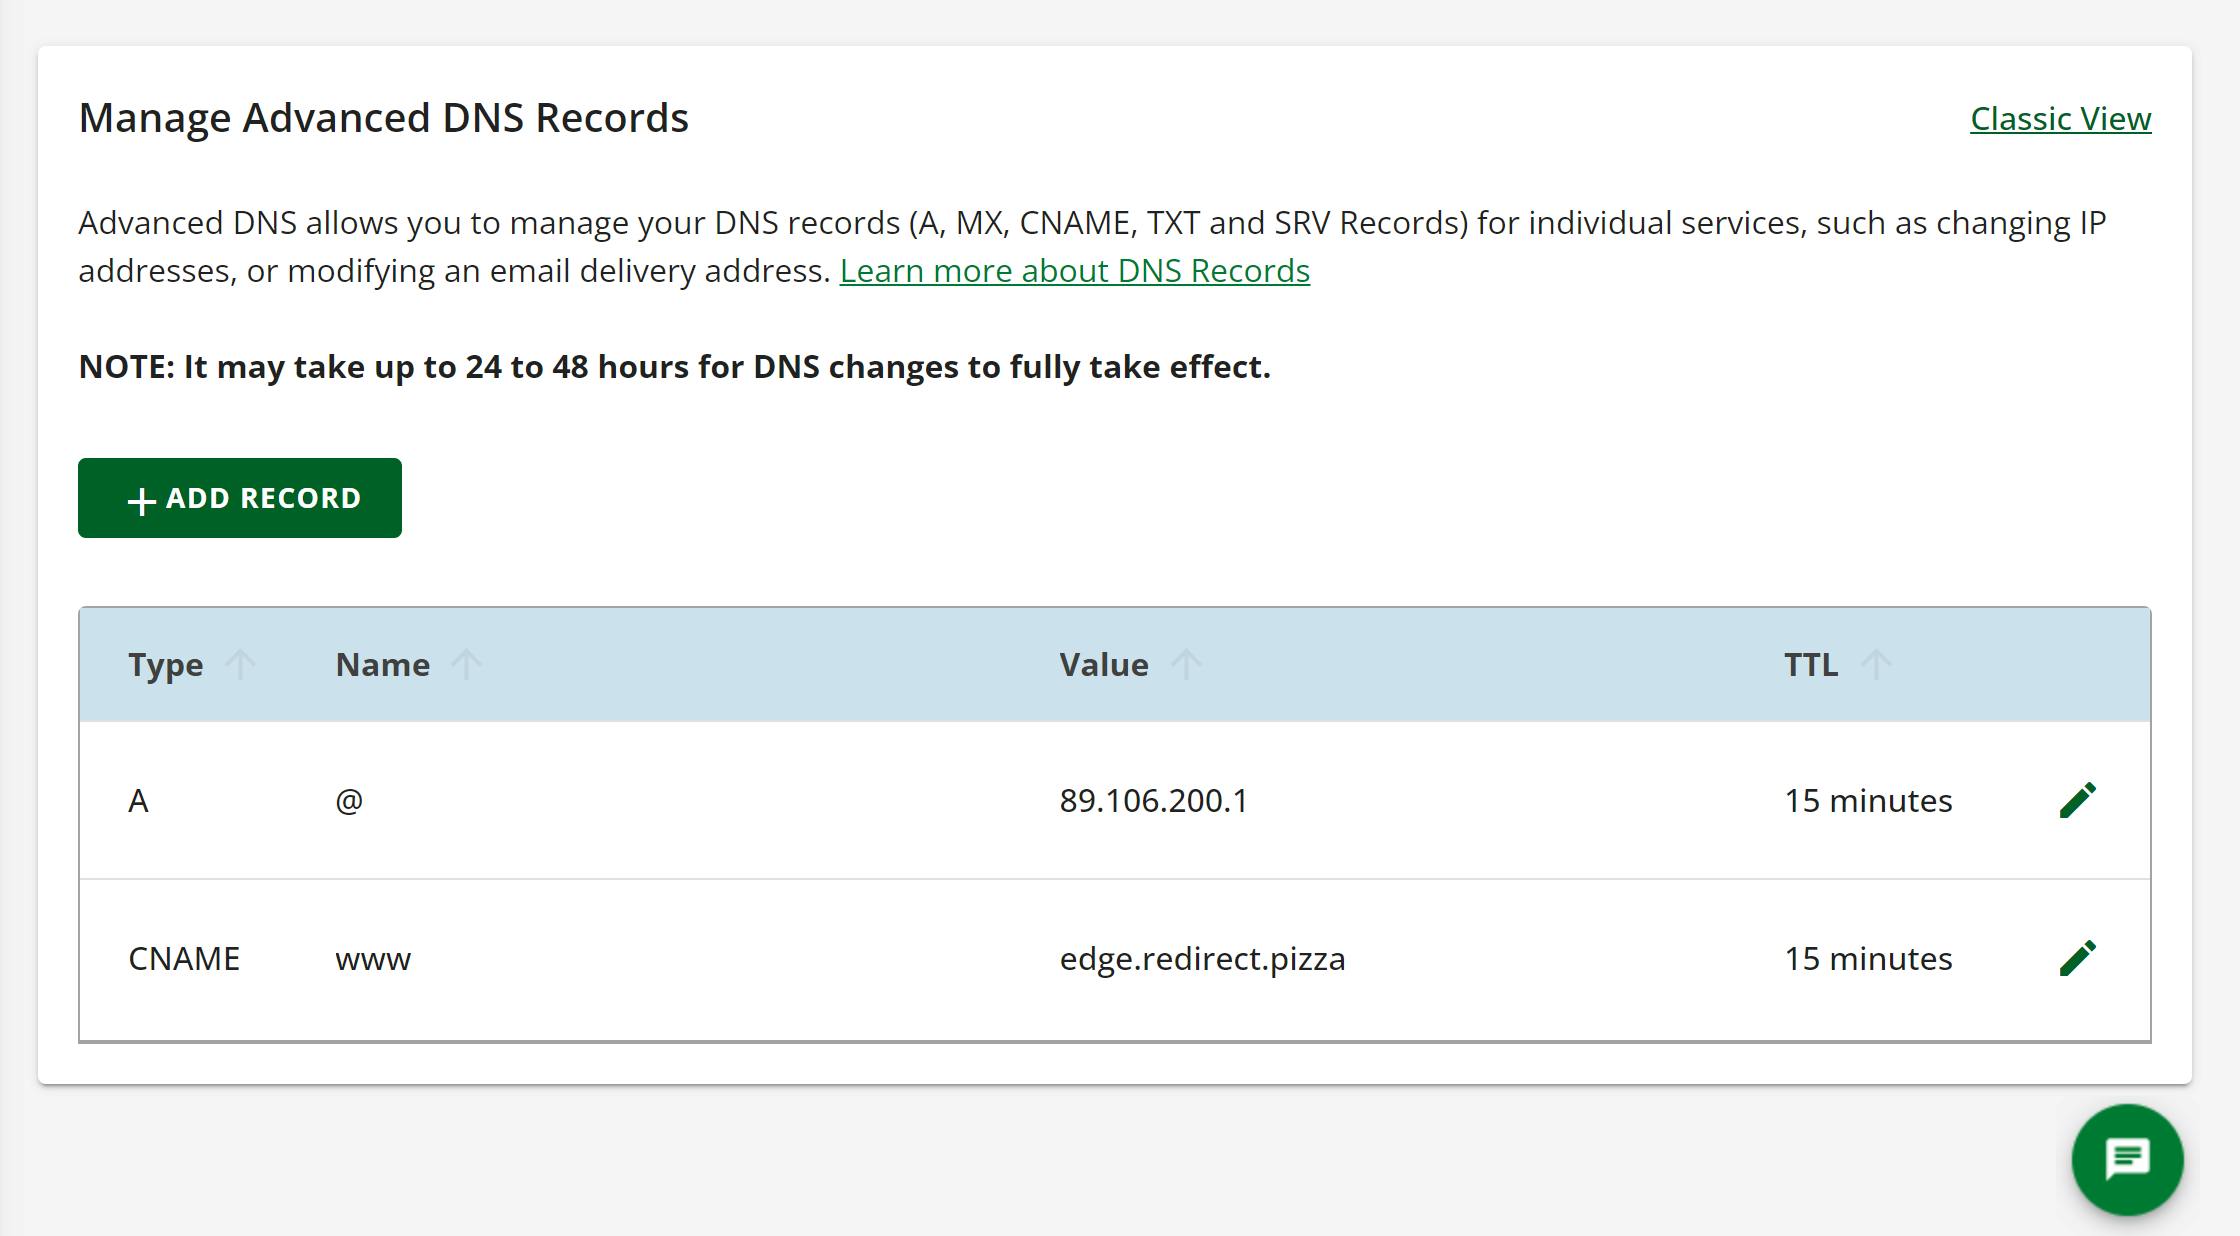
Then add the following records.
- Record with Type 'A' Name '@' and Value '89.106.200.1'
- Record with Type 'CNAME' Name 'www' and Value 'edge.redirect.pizza'
Your screen should now look like this:
Step 4: DNS verification in redirect.pizza
The DNS changes have been made! This takes some time before the internet picks up these changes. In most cases, it should be done within a few hours, depending on the TTL set on those records.
redirect.pizza will automatically keep checking the DNS records. If it's detected to be correct, a SSL certificate will be automatically requested & installed.
Closing:redirect.pizza is now set up with automatic HTTPS!
Now you’re all set! You've successfully set up redirect.pizza with Network Solutions. The domain now has full HTTPS support and is redirecting via redirect.pizza. This means all your URLs will be automatically redirected to the HTTPS version of your website. All your SSL certificates will be automatically renewed, so you’ll never have to worry about the security of your website again! This is all part of our Automatic HTTPS feature.
Optional: redirect all pages to the apex or www. version of your website. Or vice versa.
Once you’re all set, make sure to think about how you can get the most out of our service! You can, for instance, redirect all your pages from your apex domain (also called naked or root domain) to the www. version of your domain. (Wonder why you should? Take a look at our use case!). It also works the other way. If you want to redirect all your pages from the www. version to your apex domain, you’ll be good to go in just a few clicks! (Check our support page for more details).
Consider subscribing to one of our paid plans to help us out! ❤️