GoDaddy provides out-of-the-box basic support for forwarding your domain. Unfortunately, it's missing important features like HTTPS and analytics.
When the redirect is setup at GoDaddy, no SSL certificate is installed on the domain. This results in SSL errors when visiting the domain via HTTPS.
So how do you make your site secure with HTTPS when using Godaddy?
With the help of redirect.pizza! redirect.pizza automatically installs SSL certificates on your website and automatically renews them to ensure they’ll never expire. And there’s more to benefit from. You can also redirect your apex domain to the www. version of your domain in a few clicks. Or vice versa.
In this walkthrough, we’ll show you have to set this up in just a few easy steps. Let's get started!
Step 1: Create a redirect.pizza account
Get started today by creating an account: https://redirect.pizza/register.
Step 2: Add your domain to redirect.pizza
Add your domain you wish to redirect. For our example, we have a domain with GoDaddy 'redirect-pizza-example.xyz'. Add the domain to the 'Source URL' field. We recommend adding www & the apex (non-www).

You see the DNS 'checking' as the detected & required values are different.

Step 3: Navigating to GoDaddy
To allow redirecting via redirect.pizza, we need to make a one-time DNS change at GoDaddy.
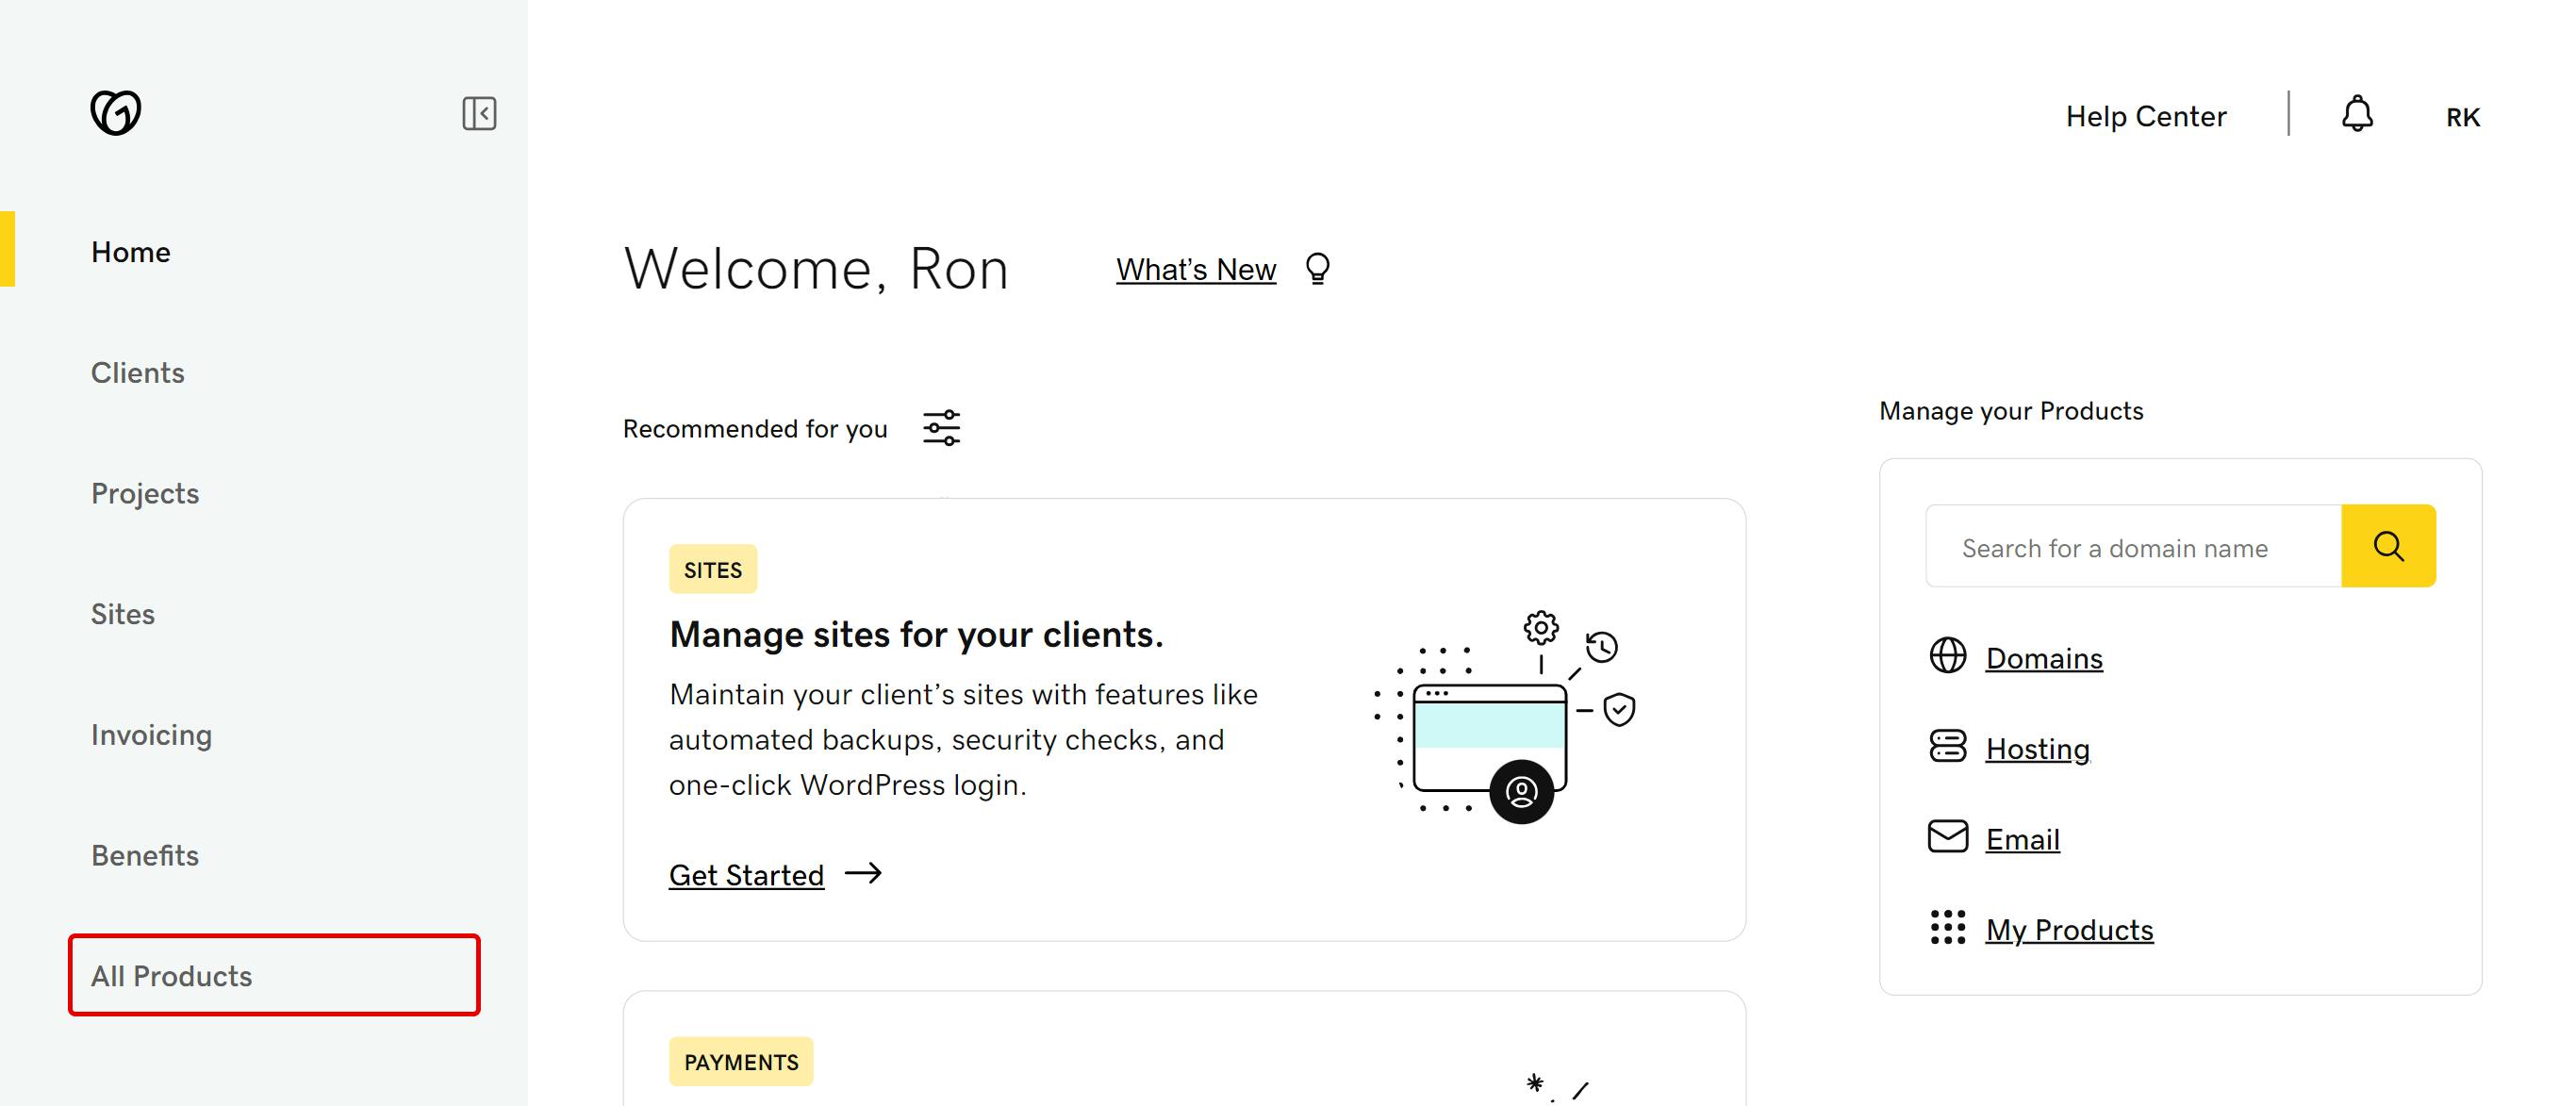
Make sure you login to your GoDaddy account and navigate to 'All Products'.
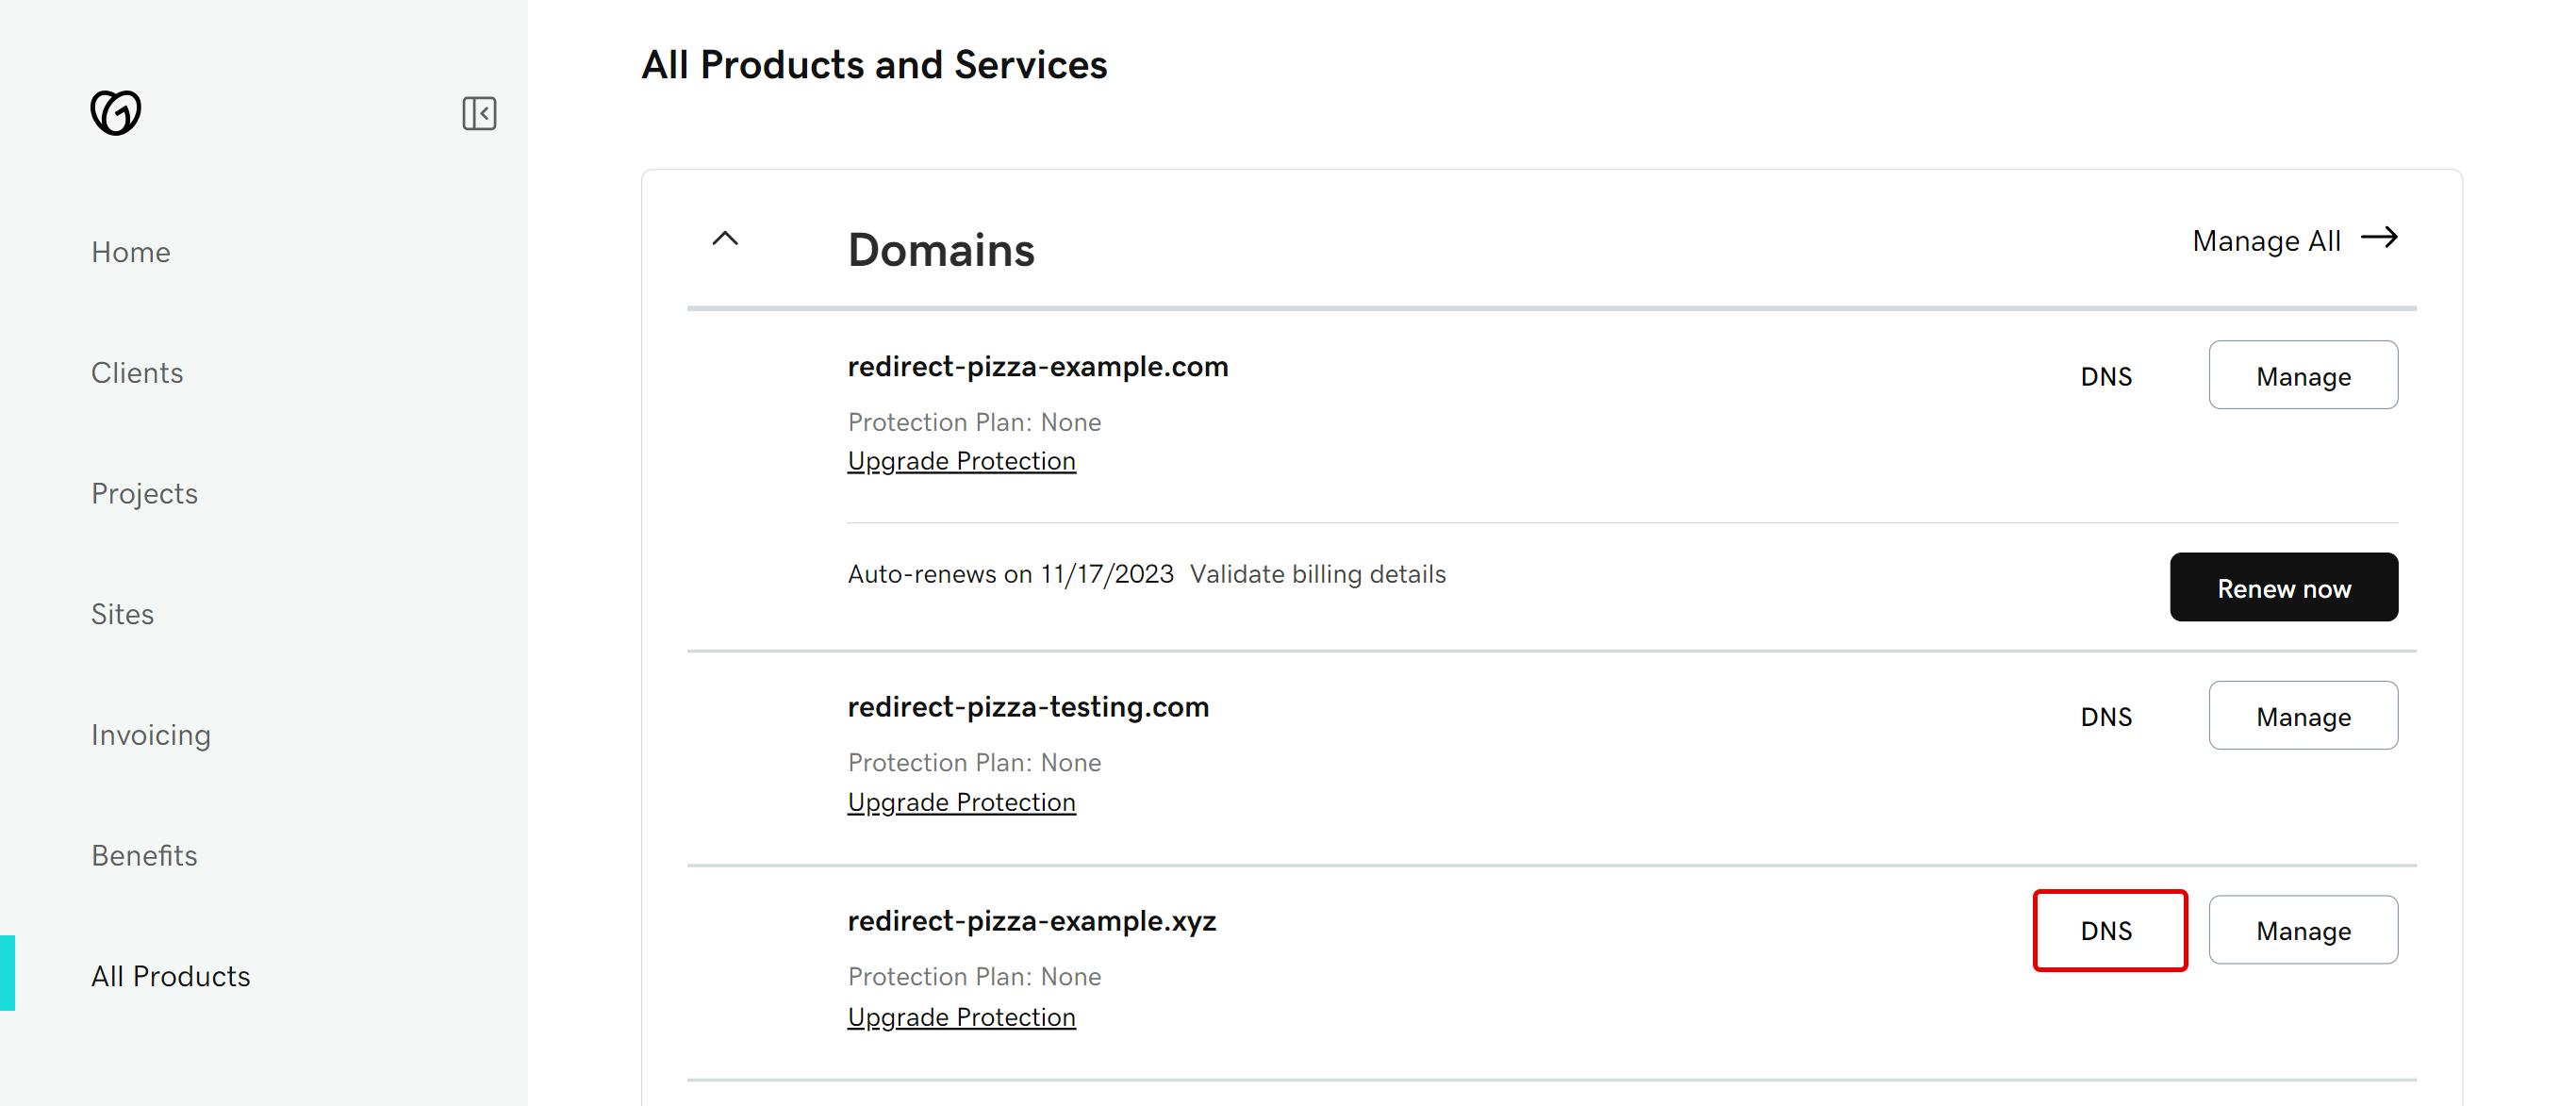
Then click on 'DNS' next to the domain that you are trying to redirect.
(optional) Step 4: Disabling GoDaddy's forwarding (when enabled)
Before we can go to Step 5 and make the neccessary DNS change, we need to make sure that GoDaddy's forwarding is disabled.
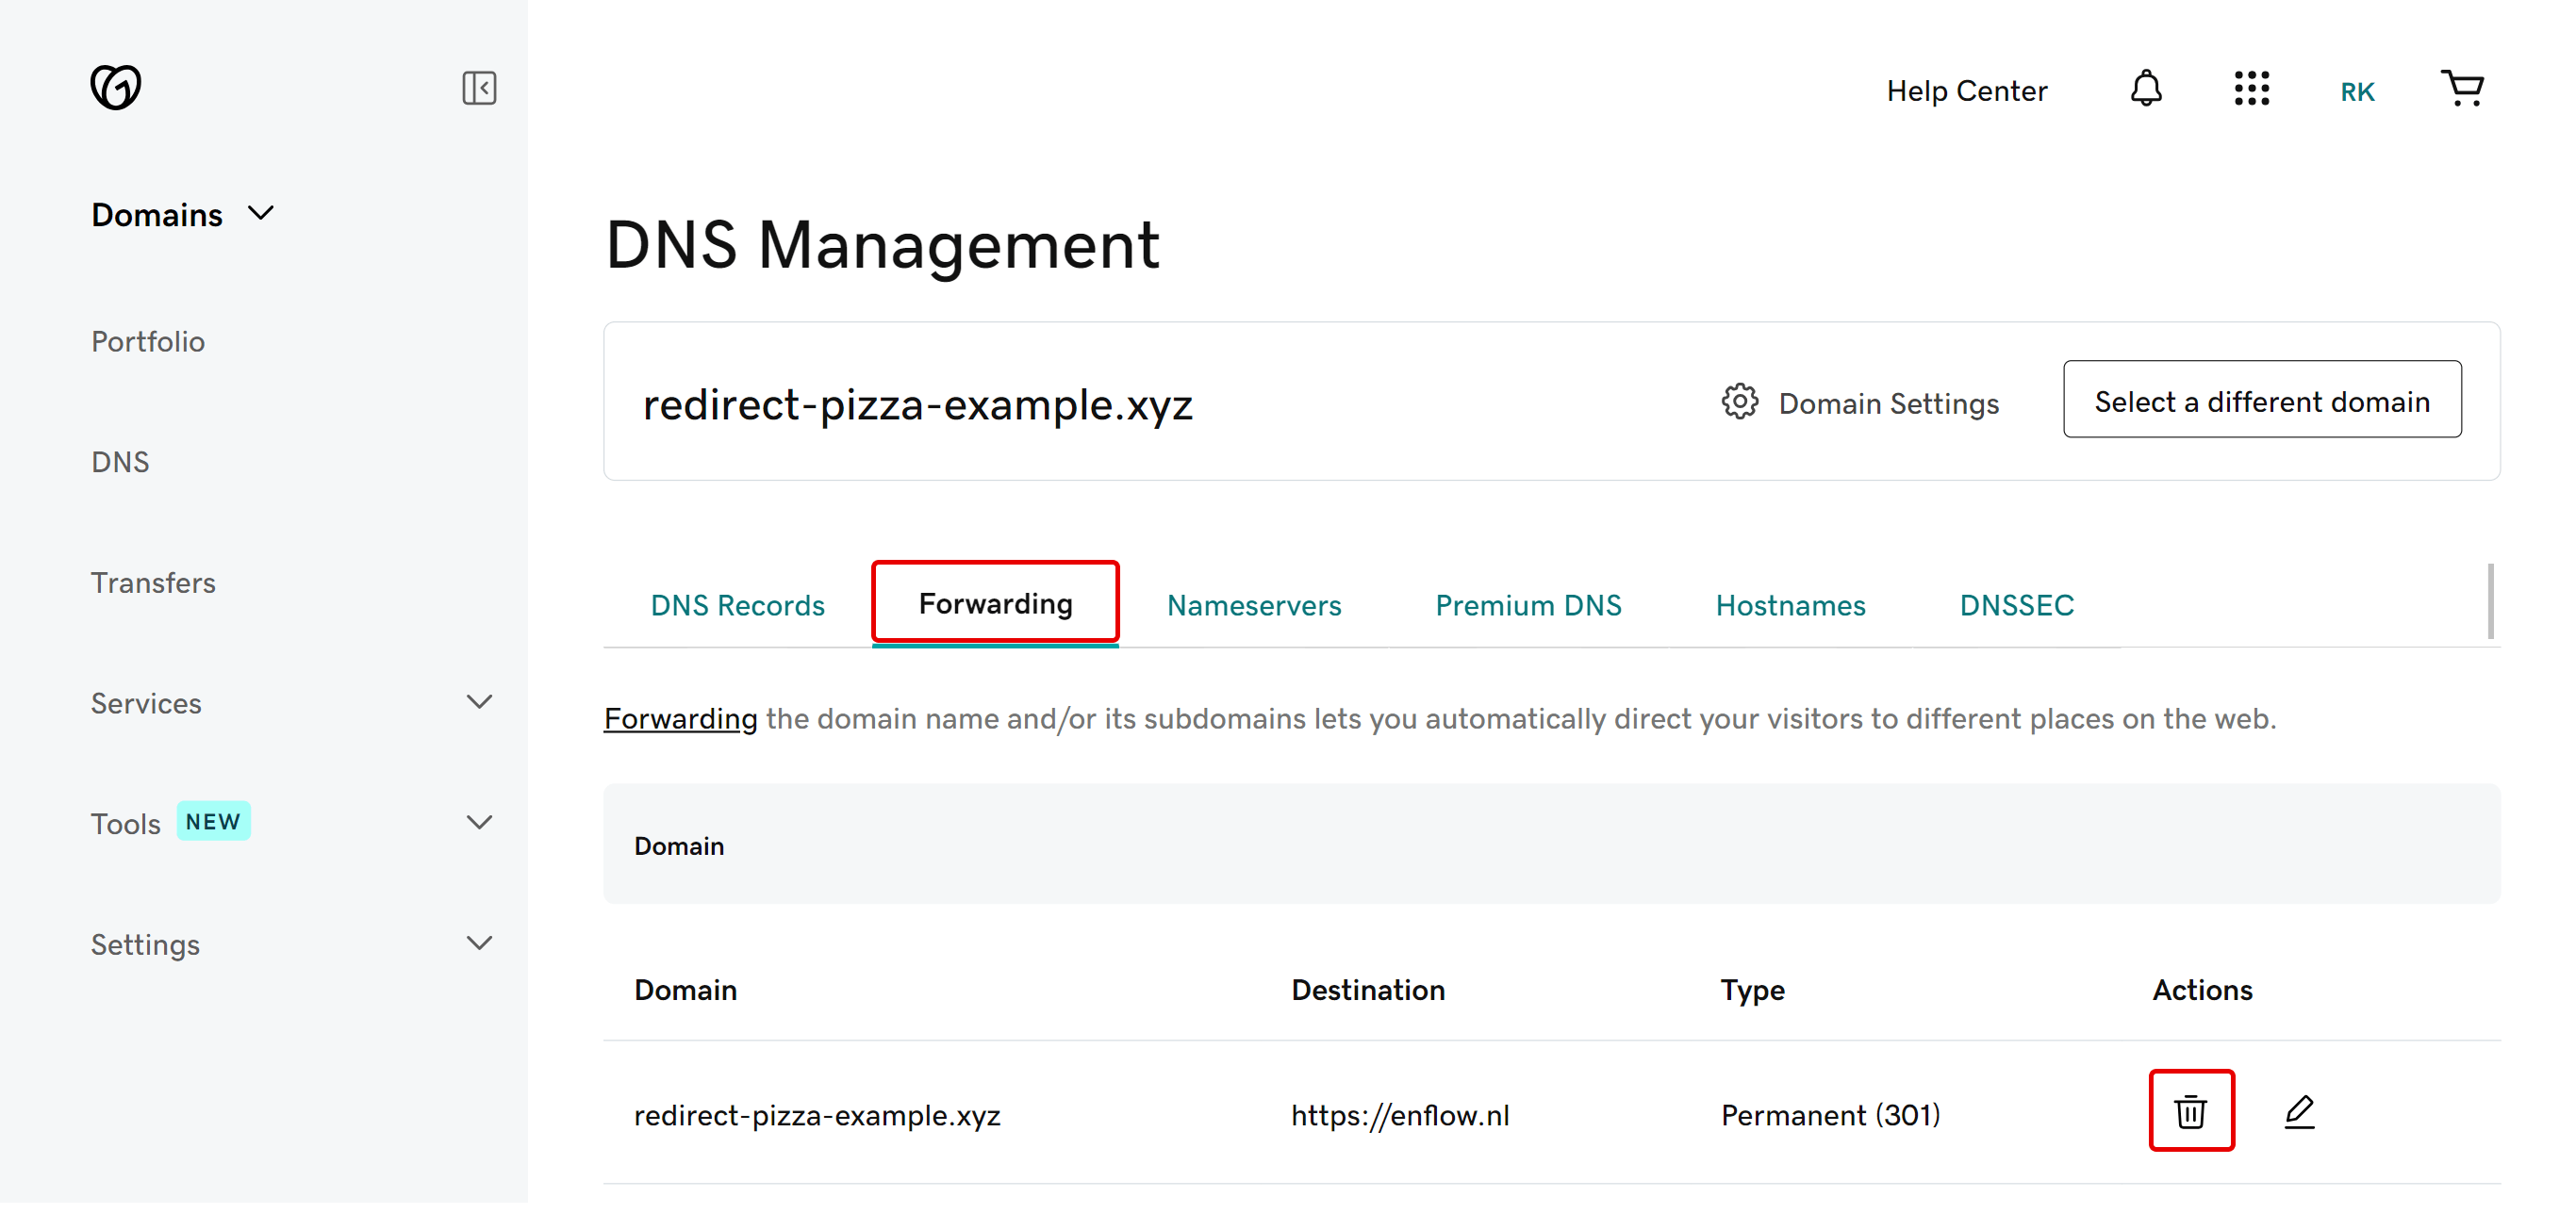
Click on the tab 'Forwarding' and then delete any existing Forward.
Step 5: Changing the DNS
We can now change the DNS. From the 'DNS Records' tab, you should now see a screen that looks something like the screen below:
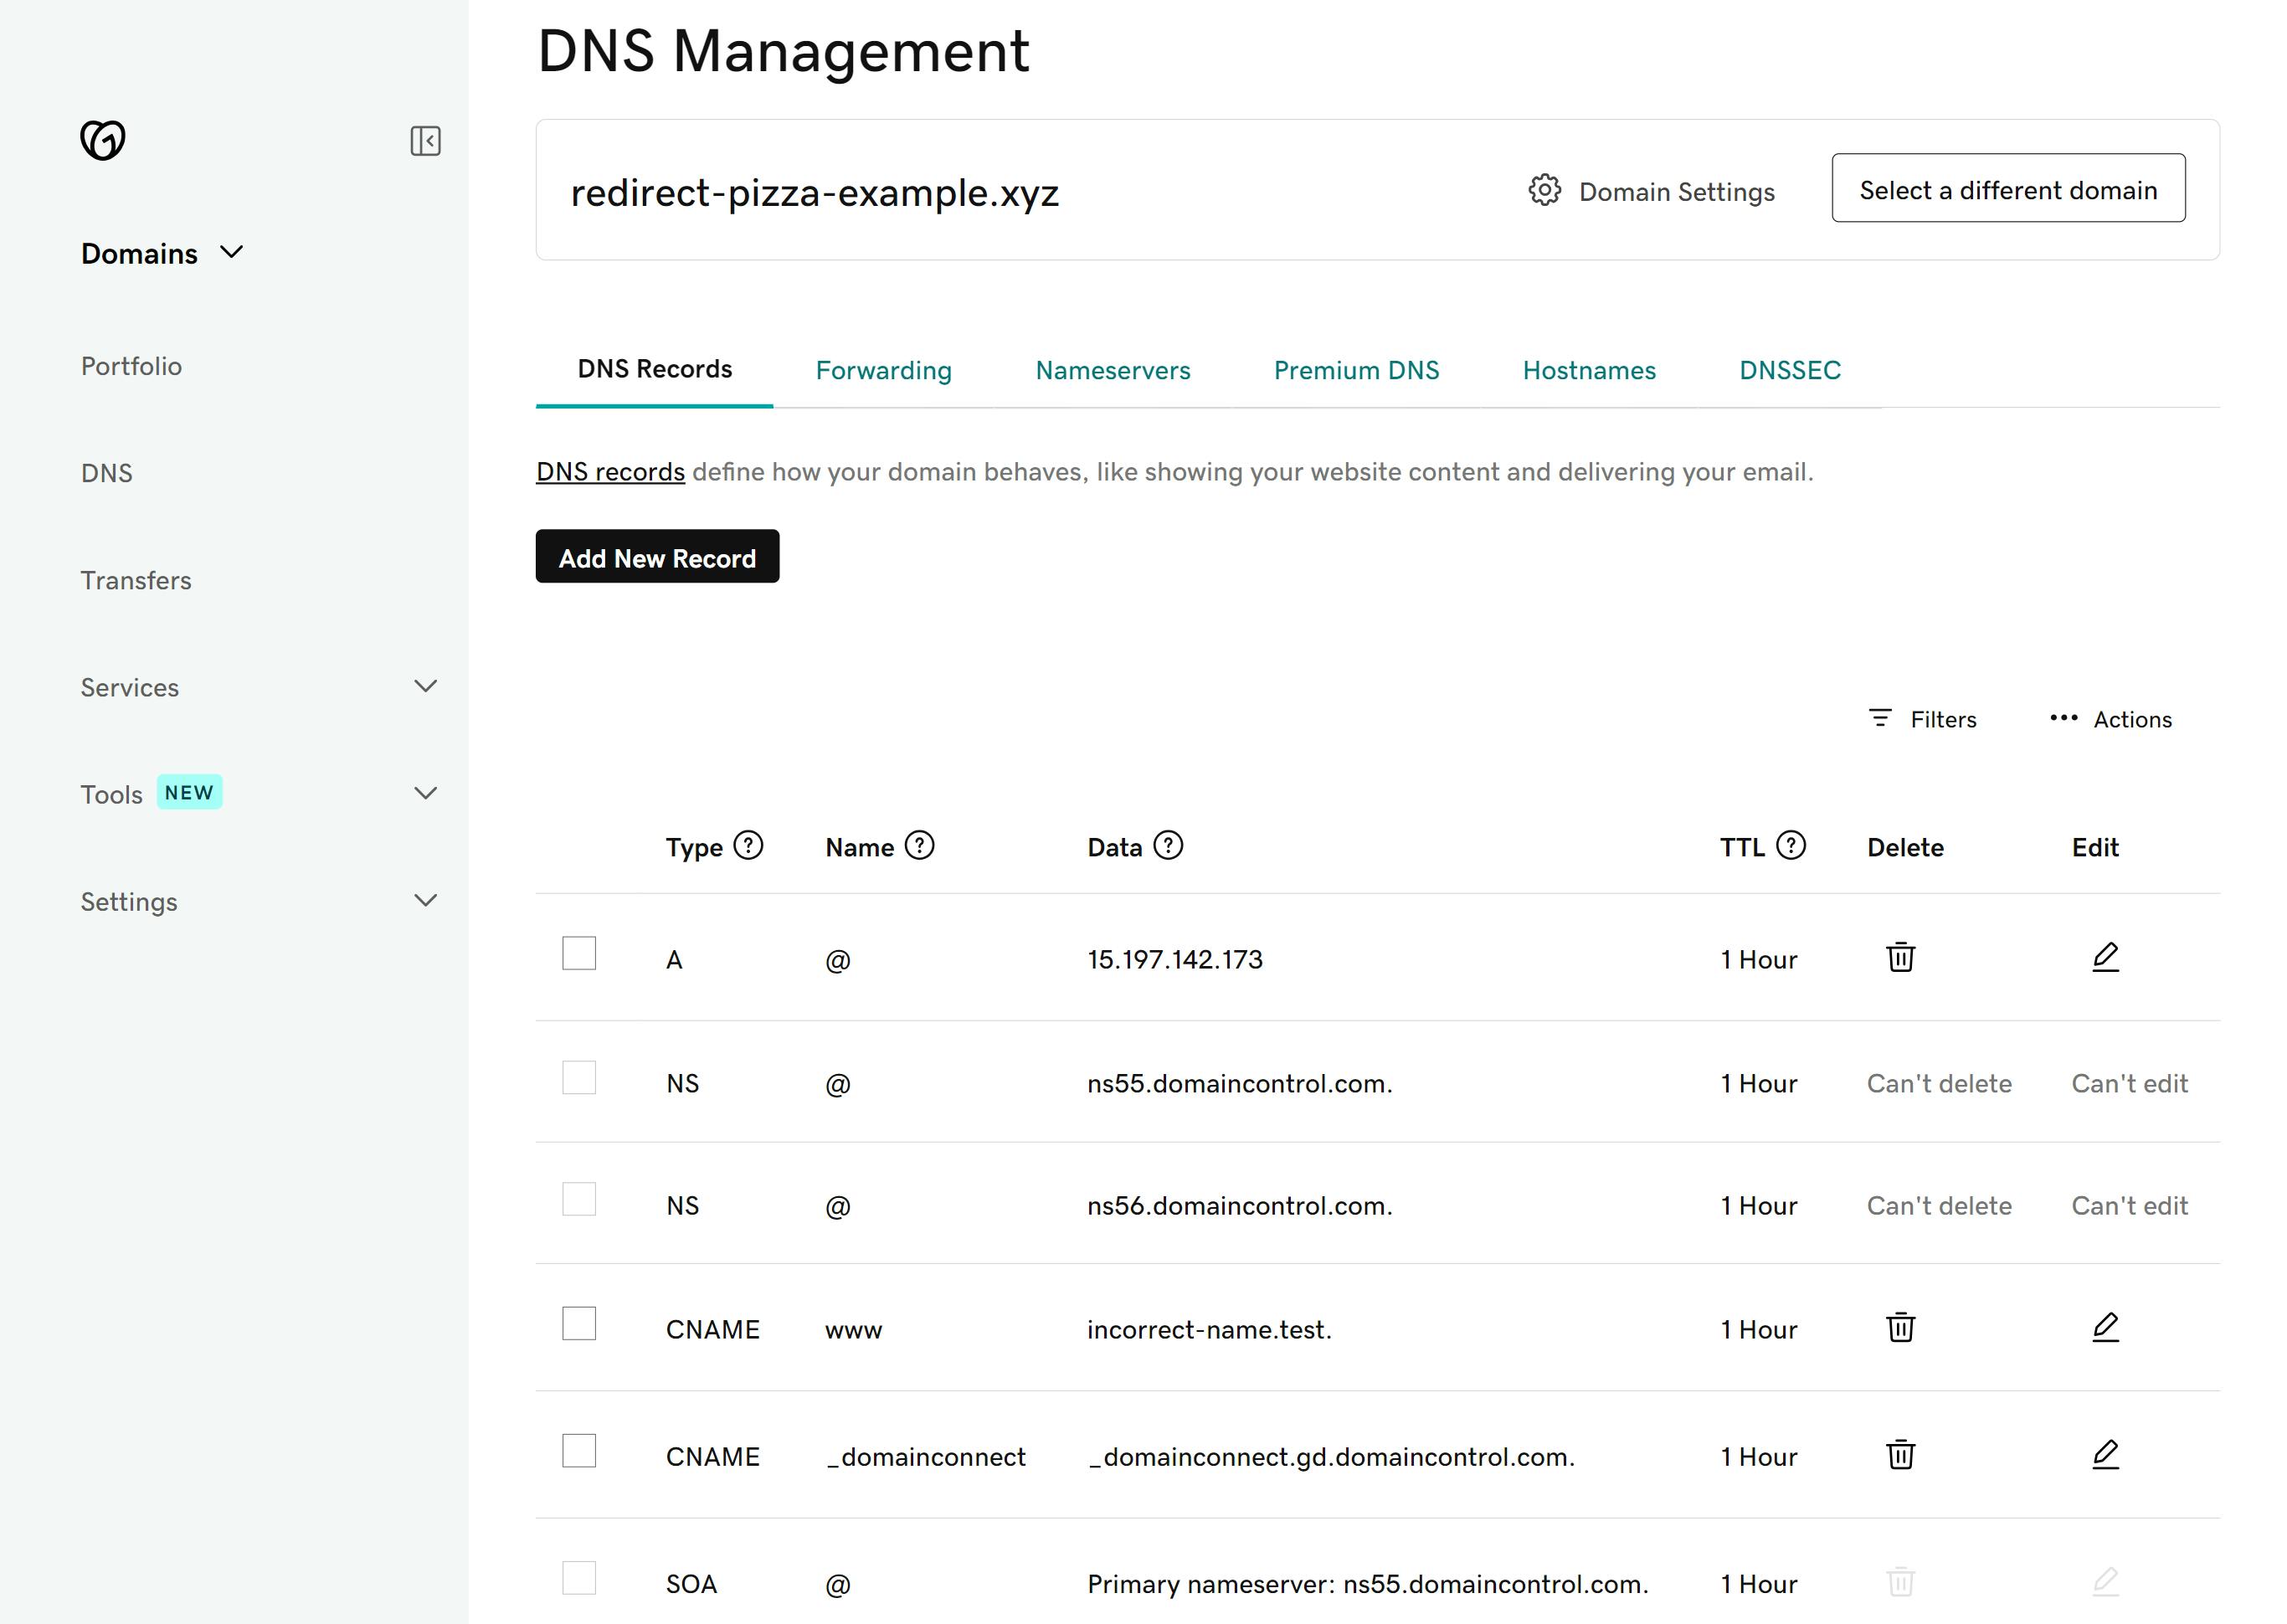
Before adding the necessary DNS records, make sure any existing A, AAAA or CNAME record for 'www' and '@' are removed. All other records may remain intact.
Then add the following records.
- Record with Type 'A' Name '@' and Value '89.106.200.1'
- Record with Type 'CNAME' Name 'www' and Value 'edge.redirect.pizza.'
That's everything in the GoDaddy portal. You can close this tab now. To confirm, it should look something like this: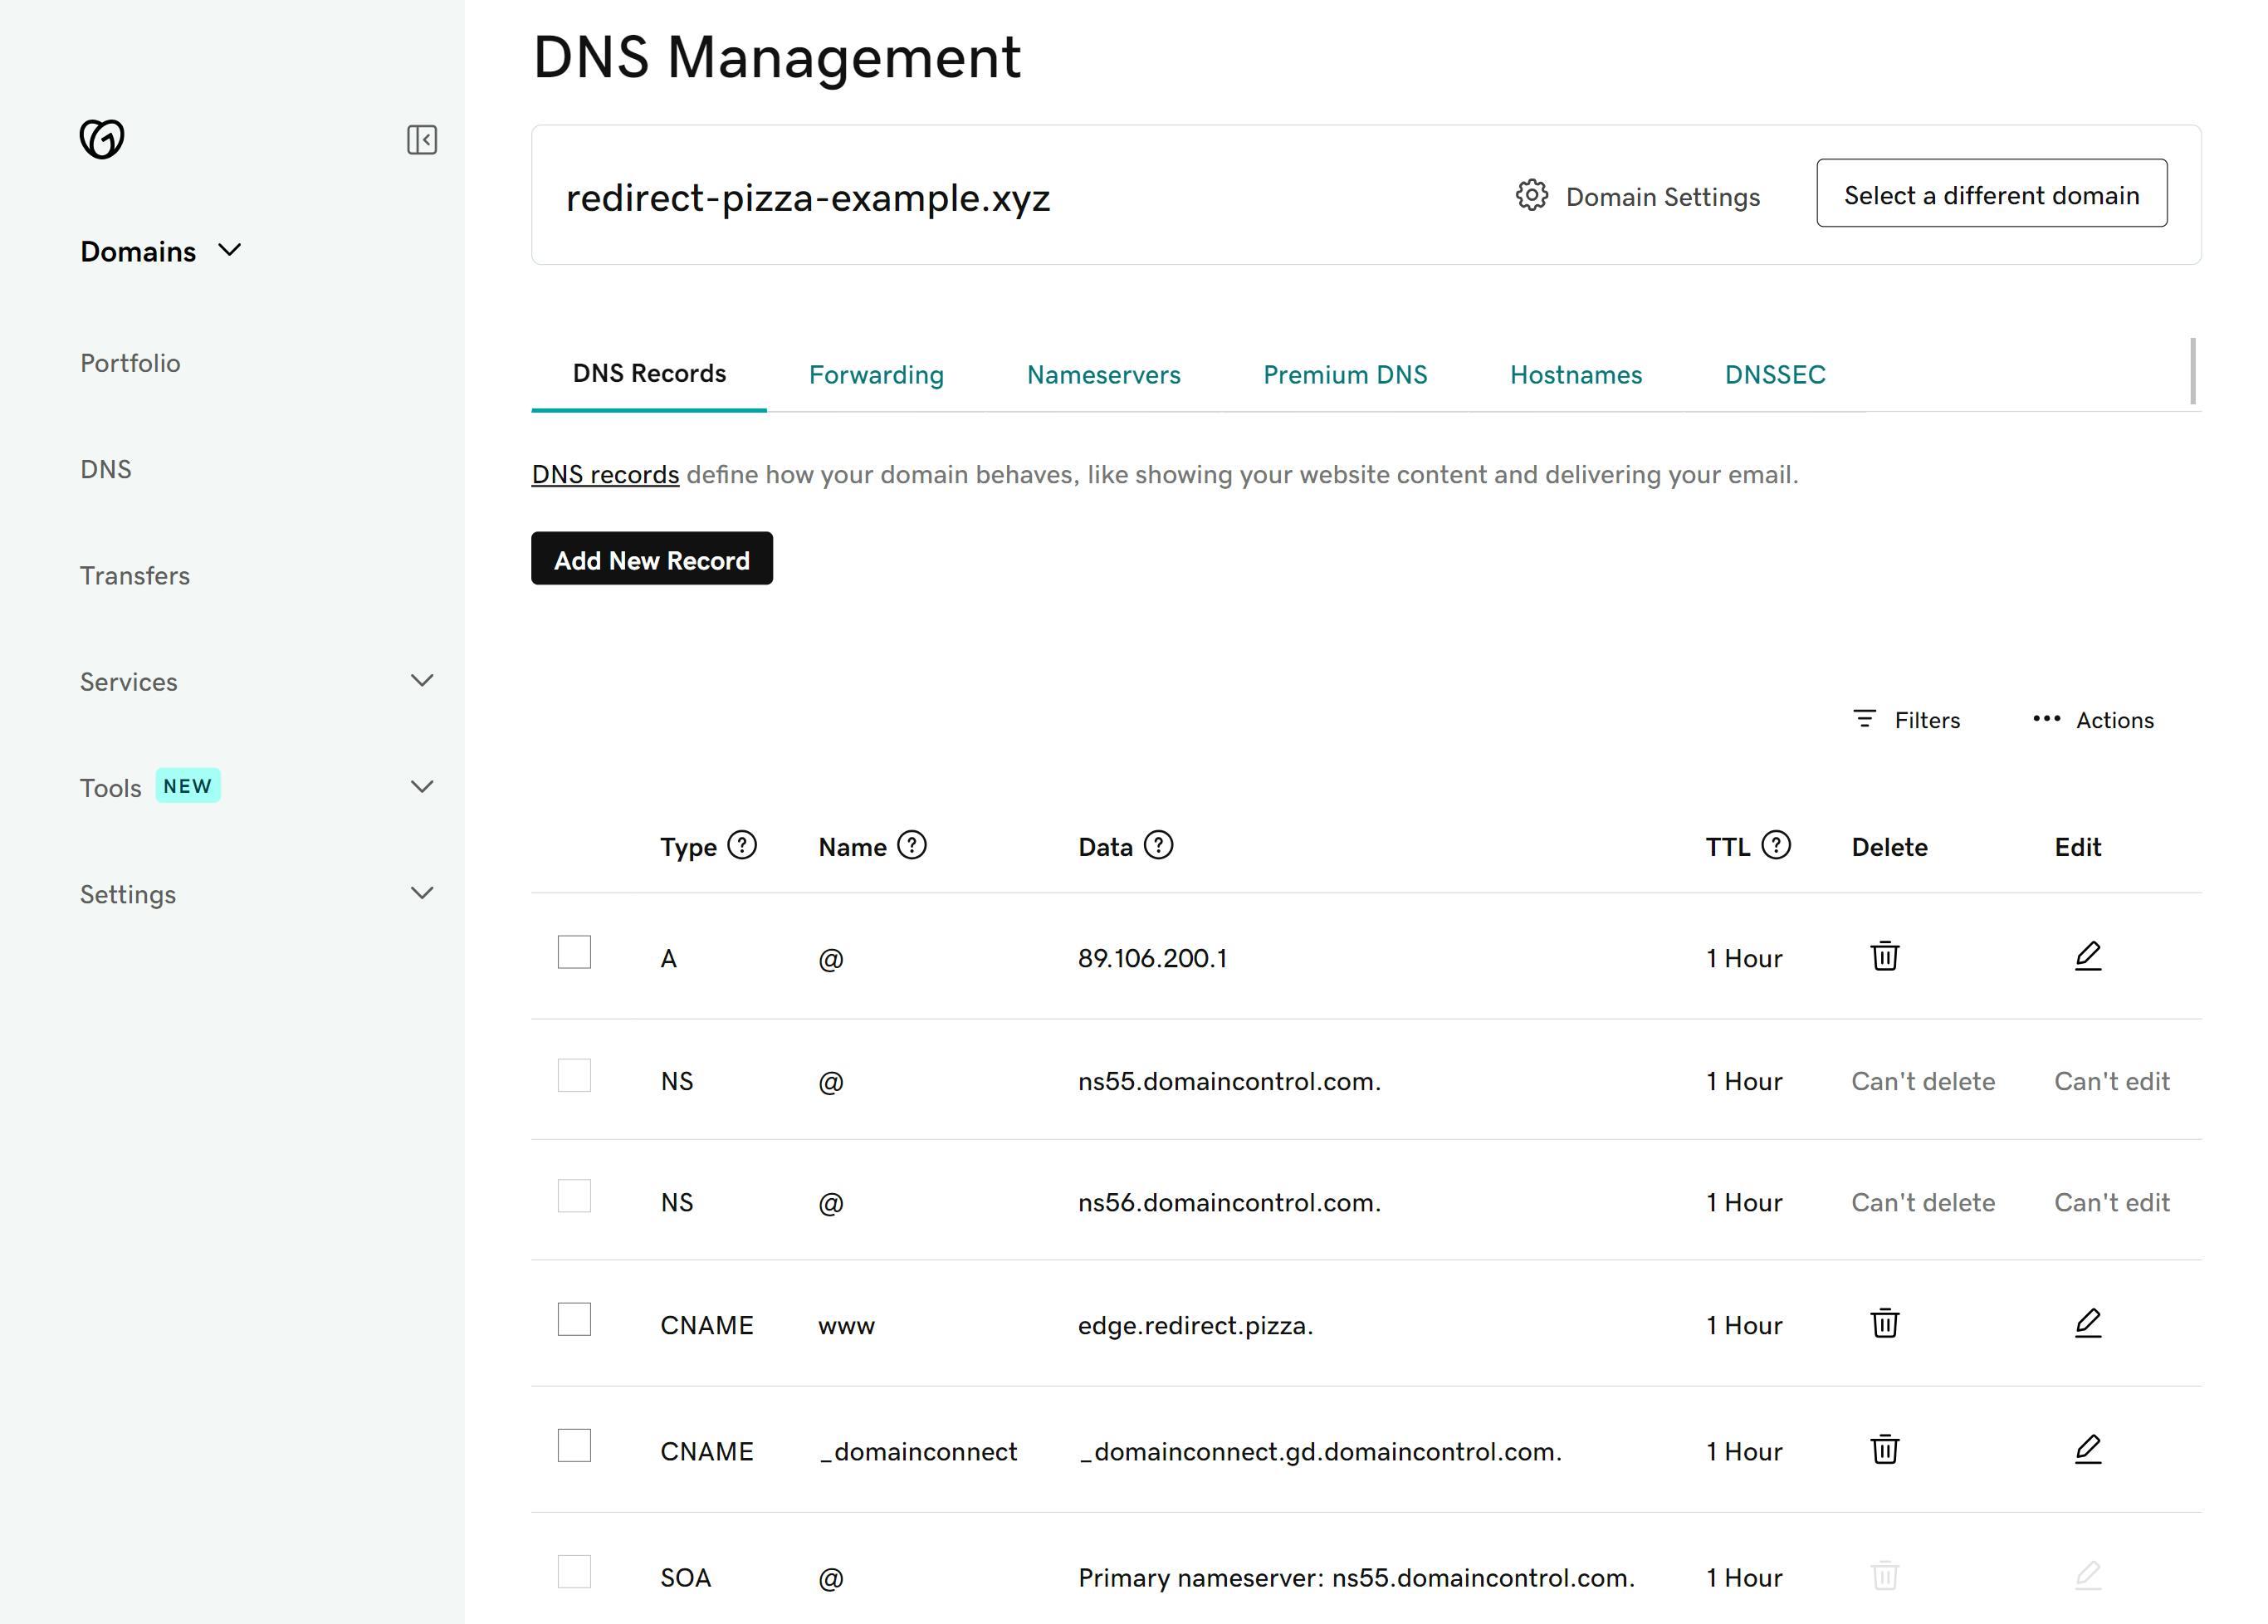
Step 6: DNS verification in redirect.pizza
The DNS changes have been made! This takes some time before the internet picks up these changes. In most cases, it should be done within a few hours, depending on the TTL set on those records.
redirect.pizza will automatically keep checking the DNS records. If it's detected to be correct, a SSL certificate will be automatically requested & installed.

Closing: redirect.pizza is now set up with automatic HTTPS!
That's it! You've successfully set up redirect.pizza with Godaddy. The domain now has full HTTPS support and is redirecting via redirect.pizza. With our full HTTPS support, you’ll never have to worry about the security of your pages again! We’ll ensure all your URLs are automatically redirected to the HTTPS version of your website. Also, the hassle with all your SSL certificates will be taken care of. We’ll make sure these will be automatically renewed, so they never become outdated. This is all part of our Automatic HTTPS feature.
Optional: redirect all pages to the apex or www. version of your website.
After you’ve successfully set up redirect pizza, don’t forget to consider how to make maximum use of our service! There is the possibility, for instance, to redirect all your pages from your apex domain, also called naked or root domain, to the www. version of your domain. (Why would you like to do that? Read more about it in our use case!). It also works vice versa. If you’d prefer to redirect all of your pages from your www. subdomain to your apex domain, it can be done in a few clicks! (Read our support page to learn more).
Consider subscribing to one of our paid plans to help us out! ❤️

